Viticulture: Tuscany Essential Edition - A Solo Review
28 Jan 2022, reviewed by Kristof
Over the years you’ve expanded your vineyard as much as possible. Now it’s time to spread your influence to the neighboring regions, make use of specialized workers with unique skills and explore the ideas a friendly carpenter has for new buildings. You’ve realized your dream, but can you dream even bigger?
Name: Viticulture: Tuscany Essential Edition
Designer: Jamey Stegmaier and Alan Stone (solo mode by Morten Monrad Pedersen)
Publisher: Stonemaier Games
Game type: worker placement
What is Viticulture: Tuscany?
Tuscany is an expansion for Viticulture. It consists of three modules you can add separately or all at once to the base game. In this review I’ll cover what’s new or different. If you are interested in my thoughts on Viticulture itself, you can check out my Viticulture review.
Module one: the extended board
The first thing that you will notice is the size of the board: it is a lot bigger! It’s not only bigger in size, but this module is also the biggest of the three in terms of new concepts it adds to the game.

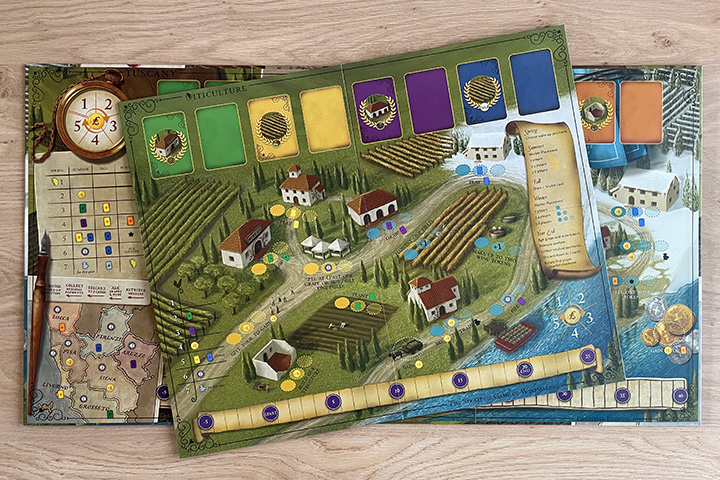
The biggest change, and the one I like the most, is the change of spring and fall to actual worker placement seasons. On the old board, those seasons would only give you a benefit: spring gave you whatever you picked on the wake-up chart and fall gave you a visitor card. You practically didn’t know those seasons existed. On the new Tuscany board, they are actual seasons where work can be done. The 12 actions spaces on the old board (six in each season) have been transformed into 16 action spaces (four in each season). Some actions have been moved (you now harvest in fall instead of in winter) and new actions have been introduced, sometimes replacing other actions. For example, the action that allowed you to sell grapes has been replaced by a trade action. That action lets you trade between four possible options: three Lira, two cards of any type, one victory point or a value one wine token. So you could for example give up a victory point for three Lira. Or give up two cards of any type for two new cards of any type.
The change of action spaces into four seasons also switches up the bonus locations within the actions. On the old board, the bonuses were always located in the second action space, forcing you to use a glass token you got from the wake-up chart to gain the bonus. On the new board, some actions have a bonus on the first action space! This means you don’t have to spend a glass token to gain the bonus. Some actions even have bonuses on multiple action spaces. This means you can put a worker on the first action space, gain that bonus and then use a glass token to gain the bonus from the second action space!
Another change I really like is the new wake-up chart. On the old board, each line on the wake-up chart listed one benefit, which you would get in spring at the start of the year. The new wake-up chart no longer gives you a benefit in spring, but it can give you a benefit in the other three seasons. For example, the sixth line gives you a victory point in summer, a winter visitor card in fall and allows you to age your grapes at the start of winter. More benefits are always good in my book!

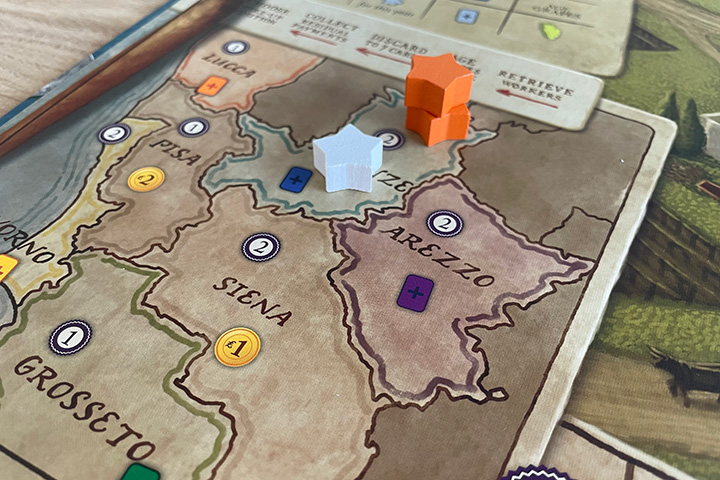
The third big change is the addition of the influence system. You’ll notice a small regional map in the lower left corner of the board. Each region comes with a benefit (draw a vine cards, get two Lira, …) and a victory point value. To use the influence map, you’ll need the six wooden star tokens in your player color. There are various cards, action spaces and bonuses in the game that let you add one of your stars to a region on the map, or move one of your stars to a different region if you’ve placed all six of them. Whenever you add a star to the map, so not when you move one, you gain the benefit of that region. Then, at the end of the game, whoever has the most stars in a region gains the number of victory points pictured on that region. Of all the new things Tuscany introduces, this is the one I like the least, and I’ll explain why when I talk about what this module means for the automa.
What does this mean for the automa?
The automa cards in the base game of Viticulture: Essential Edition are already prepared to be used in the Tuscany: Essential Edition expansion. They already use the four colors for the four seasons introduced in Tuscany and feature the new action spaces as well (with a fallback in case you would play without Tuscany). The only change I think —and this is a welcome change!— is that it can happen that the automa doesn’t place any workers in a particular season because not all automa cards have actions for all four seasons. I am always so happy and excited when that happens!
The biggest change for the automa in Tuscany comes from the influence maps and the stars. You see, the automa can’t place or move stars on the map during the game, but it starts the game with 11 stars on the map. On each region it gets a number of stars equal to the victory point value of the region. Then, at the end of game, the automa gains points for the regions where it has the majority. This means that if you completely ignore the influence map, the automa will automatically score 11 points. What’s more annoying is that if you get all six of your stars on the map, all you can do is limit the amount of points the automa gets. You cannot beat the automa on the influence map. The best you can do is limit its points in that area to five.
(Instead of placing stars for the automa you can also compare your stars to the number of victory points a region gives. Saves a bit on setup time.)
The advantages you get for placing stars on the influence map do make it good enough to not want to ignore it, so it doesn’t really feel like you’re being forced to do something you don’t want to do.
It still can be a bit frustrating when you think you’re finally going to win because you’ve passed the automa’s marker on the VP track, only to see the automa (smug face and all, the cheeky bastard) sweep past you when you count the points from the influence map. Maybe I should put a sticker “Remember the influence points” on the board so I stop forgetting about that part.
I’ve found a thread on the BGG forums about this design decision and it turns out it was done to balance the solo game a bit. Numerous play tests revealed that the Tuscany changes made it too easy to win the solo mode without the automa scoring extra points from the influence map. So at least there’s good reason this system works the way it works. I just have to get better at the game I guess!
Module two: special workers
This module consists of eleven special worker cards, two special worker meeples per player color and two gray special worker meeples.
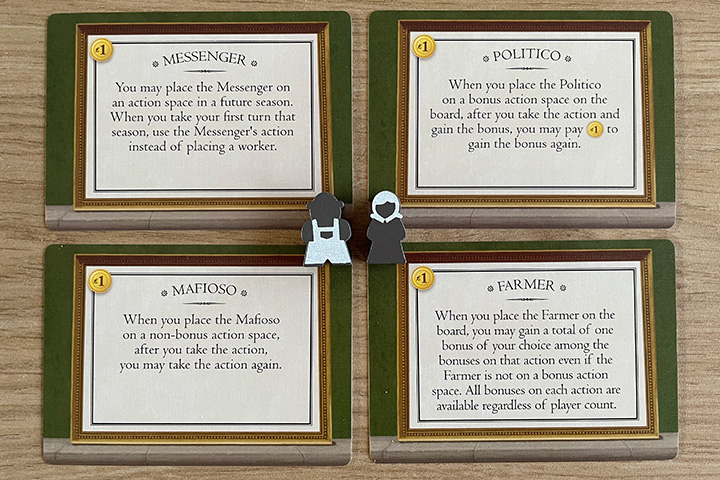
At the beginning of the game, before you draft your Mama and Papa, you shuffle the special worker cards and select two random ones. Place them on the table and put one of the gray special worker meeples on each card. This makes it clear which special worker meeple corresponds to which special worker ability.
Whenever you train a new worker, doesn’t matter if it’s via the “Train a worker” action space or via a card, you have the option to pay 1 Lira extra to gain a special worker instead. You just take the special worker meeple corresponding to the one you want to train and that’s it. Since you only have one meeple of each type, you can only hire each special worker once.
These special workers are a great addition to the game because their abilities open up a variety of new approaches and strategies. Some even give you a way to work around the blocking nature of the automa!
Here are a few examples of special worker abilities:
The Professore
This one basically gives you an extra worker. In the multiplayer game this opens up the action space to other players, but you don’t have that disadvantage in the solo game.
When you place the Professore, you may retrieve 1 of your regular workers from an action space on the board in the current season. That worker is available to be played again this year.
The Oracle
This is an excellent way to mitigate the luck of the draw somewhat.
When you draw cards with the Oracle, draw 1 extra card of the same type and discard 1 of the cards you drew. You may not draw more than 1 extra card per turn with the Oracle.
The Traveler
I see this one as a time traveling Grande worker. Did the automa block the action to plant a vine? No worries! Just wait until the next season and send your traveler there!
You may place the Traveler on any open action space in a previous season of the current year, regardless of the action spaces available based on player count. Immediately take that action.
What does this mean for the automa?
Nothing! The automa doesn’t get or need the special workers. The only impact on a solo game is that there are four special worker cards that you can’t use because they involve other players somehow.
Module three: structures
This module consists of 36 structure cards (with an orange backside), an extension for your player board and requires you to use the backside of the new game board. The board’s backside is identical to the front, except for the space at the top that’s reserved for the deck of structure cards and a few actions that allow you to draw a structure card as a bonus.
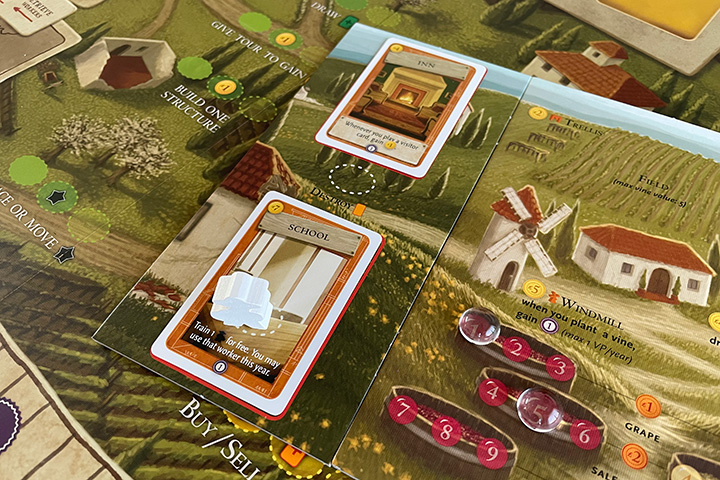
The “Build one structure” action space, which you would normally use to build buildings like the cottage or the windmill, can now be used to play (build) structure cards from your hand as well. You can either build them on one of the two spaces on the extension for your player board or on an empty unsold field. The cost (in Lira) to build a structure is indicated on the card and each structure gives you 1 victory point when built.
There are three types of structures:
- Action structures have an action space only you can use. For example, when you’ve built the Wine Bar and you place a worker on its action space, you get two victory points, but you have to discard a wine token. Or the Wine Cave gives you a wine order card and lets you age up to two wine tokens.
- Enhancement structures just give you an ongoing bonus. For example, after you’ve built the Wine Parlor, you get two Lira every time you fill a wine order. Or the Barn which allows you to discard two cards at the end of every summer in exchange for one victory point.
- Residual structures give you a bonus at the end of each year. For example the Statue gives a victory point at the end of year and the Silo gives you a vine card at the end of each year.
Some of these buildings are pretty good. Not all of them will be useful in all situations, but I do feel structures are a worthy direction to explore. Drawing structure cards is probably something you want to do early in the game since that way you could build your strategy for the rest of the game around them and it also increases the overall profit you can gain from the residual structures.
What does this mean for the automa?
Nothing! Since the automa doesn’t get cards or build buildings it also can’t build structures. There are a few structures that only make sense in the multiplayer game, like the Academy which forces your opponents to pay you one Lira whenever they train a worker. If you ever draw one of these, just discard it and draw another one.
What is my overall verdict?
I’ll start by saying I don’t play Viticulture without Tuscany anymore; I always add in all three Tuscany modules.
I love the new board with the four seasons and extended wake-up chart. I’m not entirely fond of the influence chart in the solo mode, for the reasons mentioned above, but I’m warming up to it.
I love the new special workers. They can be really powerful and if you have the one Lira to spare, you would be crazy to train a regular worker instead of a special one.
I like the structures. They are probably an addition to the game I don’t make use of enough. While writing this review I went through the available structure cards and that made me realize I should probably start drawing those cards more often and earlier in the game. They have the potential to really spice things up.
As far as I’m concerned, Tuscany turns a good game into a great game.
Score
To make things easier for myself, I use the same scoring categories Board Game Geek uses.
Comments
I'm sorry, I don't support comments on my website. If you want to discuss the game or my review, feel free comment on this dedicated Instagram post or my review on BGG.