Legacy of Yu - A Solo Review
10 Jun 2023, reviewed by Kristof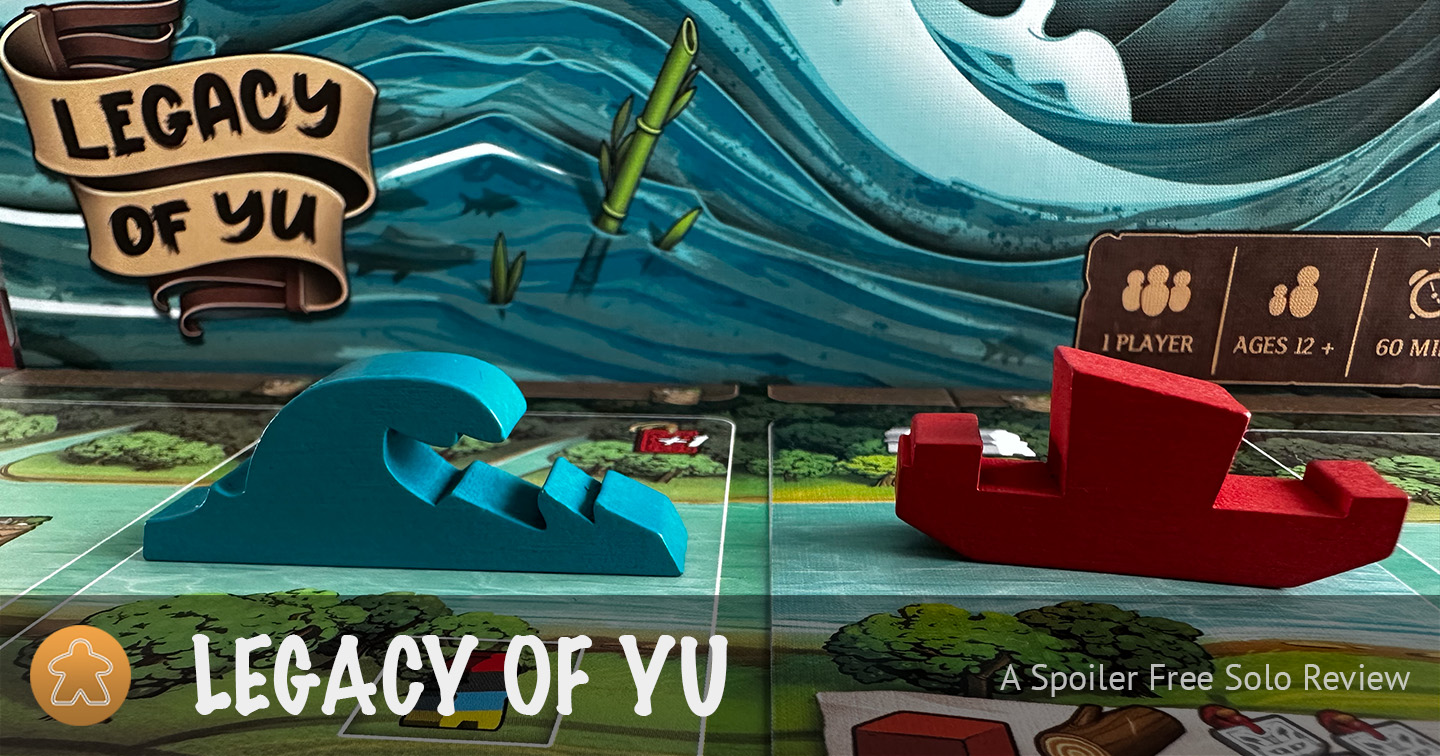
Ancient China, Xia Dynasty. The regularly flooding Yellow River makes this a difficult time and place to live. Emperor Yao has ordered you to come with a solution to these floods. Oh, and could you please deal with the barbarians as well? Are you pragmatic and flexible enough to cope with the dynamic circumstances and go with the… flow? Let’s find out in this spoiler free review.
Name: Legacy of Yu
Designer: Shem Phillips
Publisher: Garphill Games
Game type: worker placement, hand management, campaign game
What is Legacy of Yu?
Legacy of Yu is the third game in the Ancient Anthology series by Garphill Games—the other games being Raiders of Scythia and Hadrian’s Wall—and unlike the two previous games in the series, Legacy of Yu is a solo only game.
The game takes place during the reign of Emperor Yao in ancient China’s Xia Dynasty. In that time the Yellow River’s many floods caused a lot of damage to the land and the people. Your father, Gun, was given a shot—hehe—by the Emperor to come up with a plan to deal with the floods. Nine years of experiments with dams and dikes were not enough to find a solution to the problem. After your father’s passing, you—Yu—have inherited your father’s work. Leaning from his failures, you think that, instead of dams and dikes, canals might be an avenue worth exploring. These canals could direct the surging river into nearby fields and smaller waterways, away from where it can do damage.
Over the course of at most 13 years (games) you will take on this challenge and try to perfect your solution. But you don’t have to deal with just the river. You’ll also need to come up with a way to defend your villagers from neighboring barbarians.
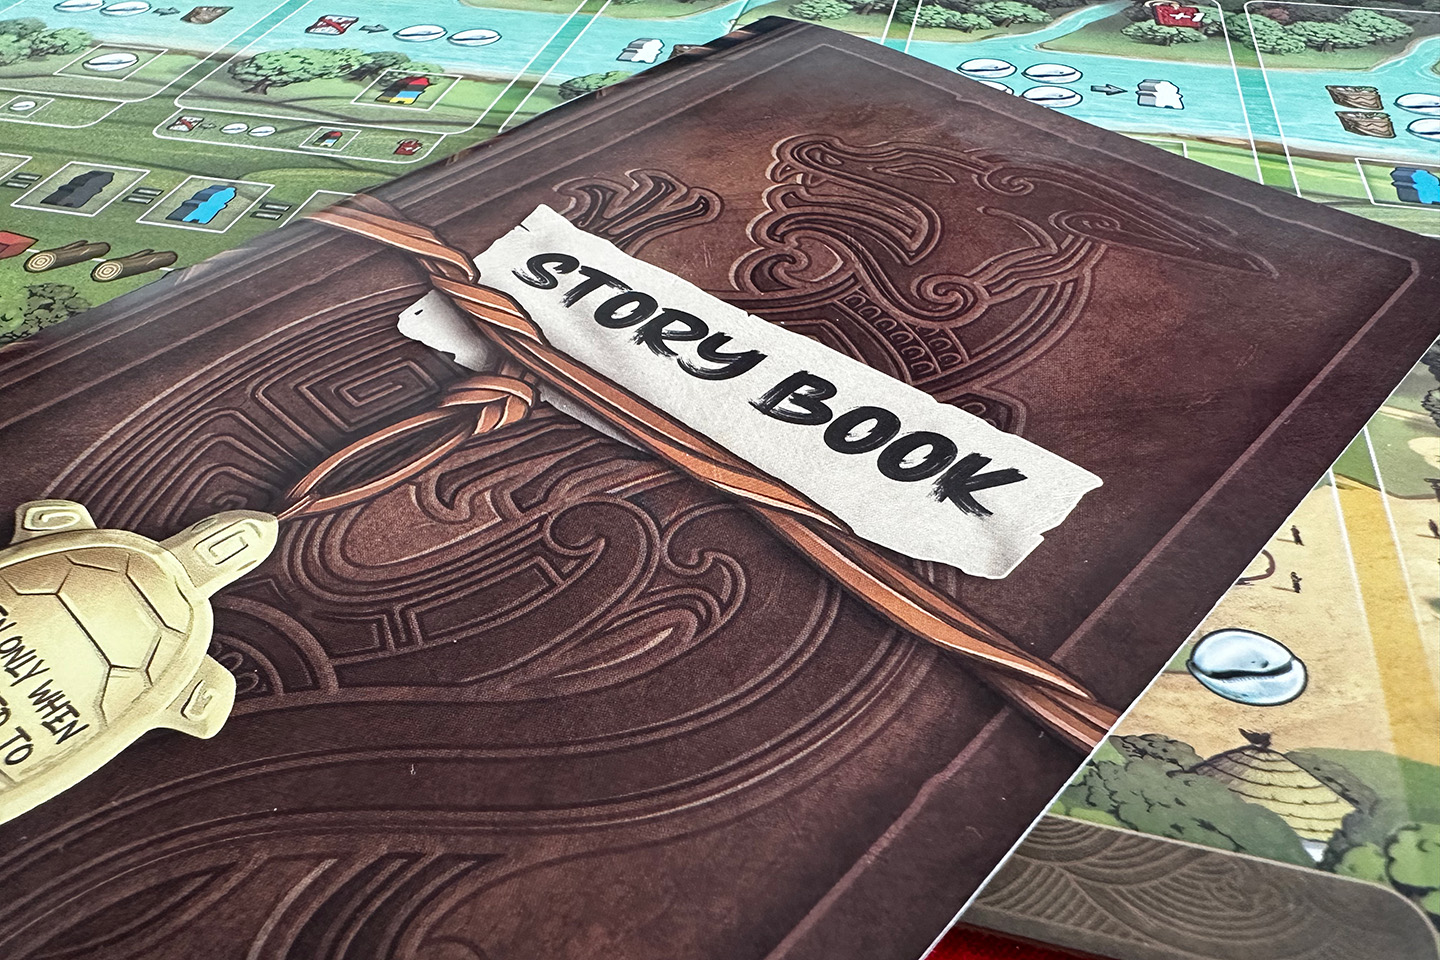
Legacy of Yu is a campaign game, which means that various things you do in the game will direct you to certain paragraphs in the accompanying story book. These story elements will remove certain cards from your next games and/or add new ones. This way new concepts are slowly introduced. The campaign also features a self-balancing system. When you win a game, you unlock cards that will make your next games a bit harder. Similarly, when you lose a game, you unlock cards that will make your next games a bit easier. Once you win or lose seven games, the campaign ends and leads you to the final story in the story book.
Unlike what the title of the game might lead you to think, this is not a legacy game. The campaign is fully resettable and during you first playthrough, you will only see 40–60% of the story book.
How does it play?
Before I’ll go over how the game plays, I’ll explain what you need to do to set up the game. Because of the relatively few components and excellent insert, this is done in no time.
- Lay out the game board.
- Put six canal cards and four hut cards on the board.
- Shuffle the townsfolk and barbarian decks and place six townsfolk cards and one barbarian card above the board.
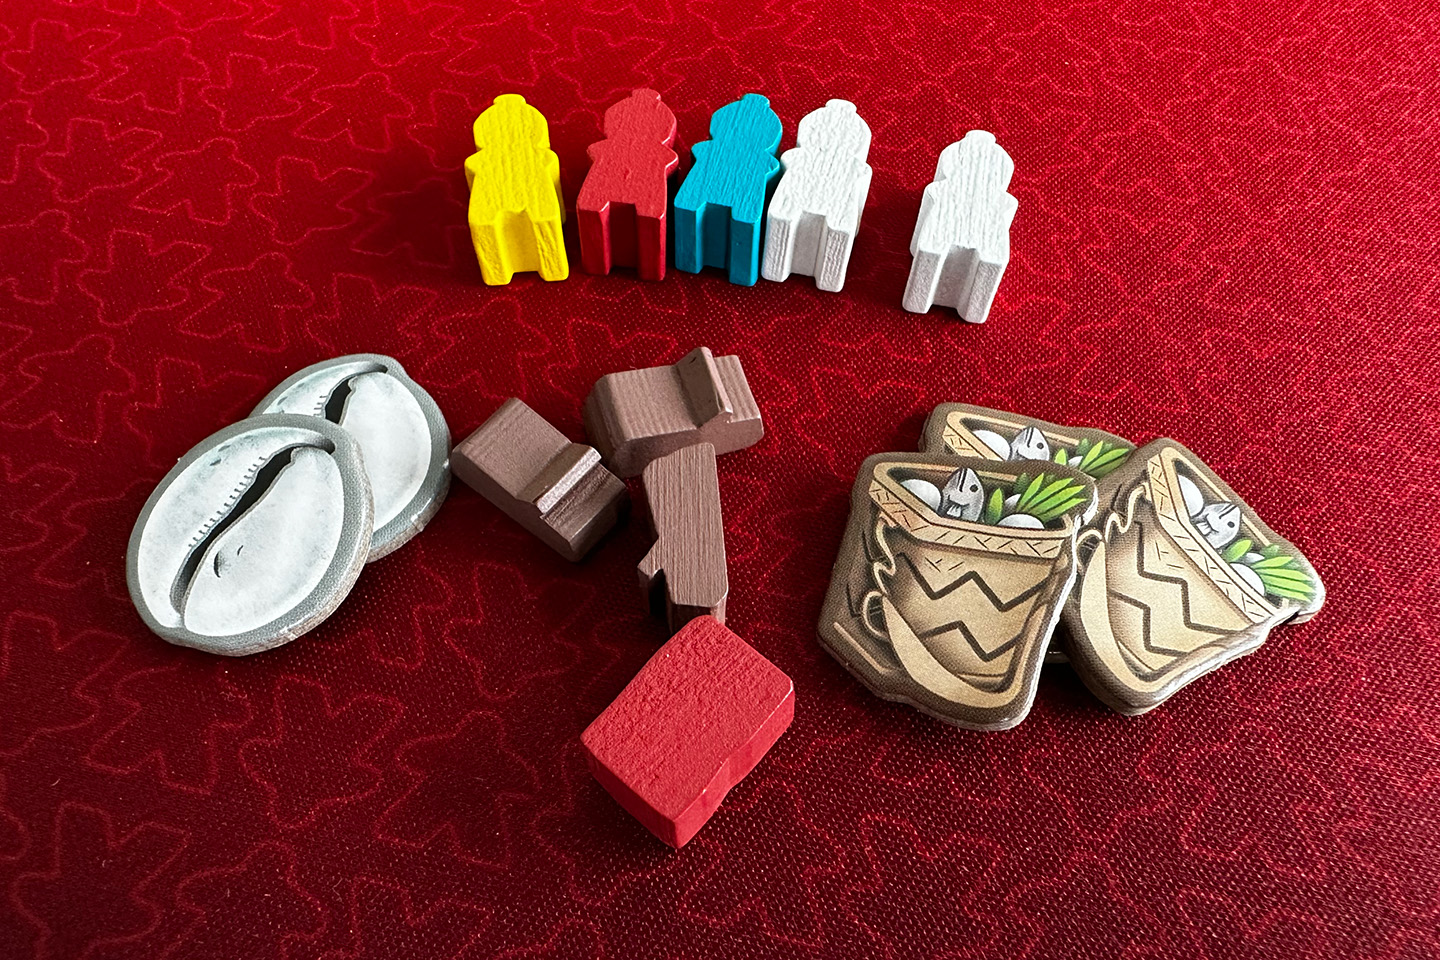
- Place the 11 buildings, the barge and the flood on the board.
- Take 10 townsfolk cards and place them in a facedown stack below the board; this is your Ready Pile.
That’s it!
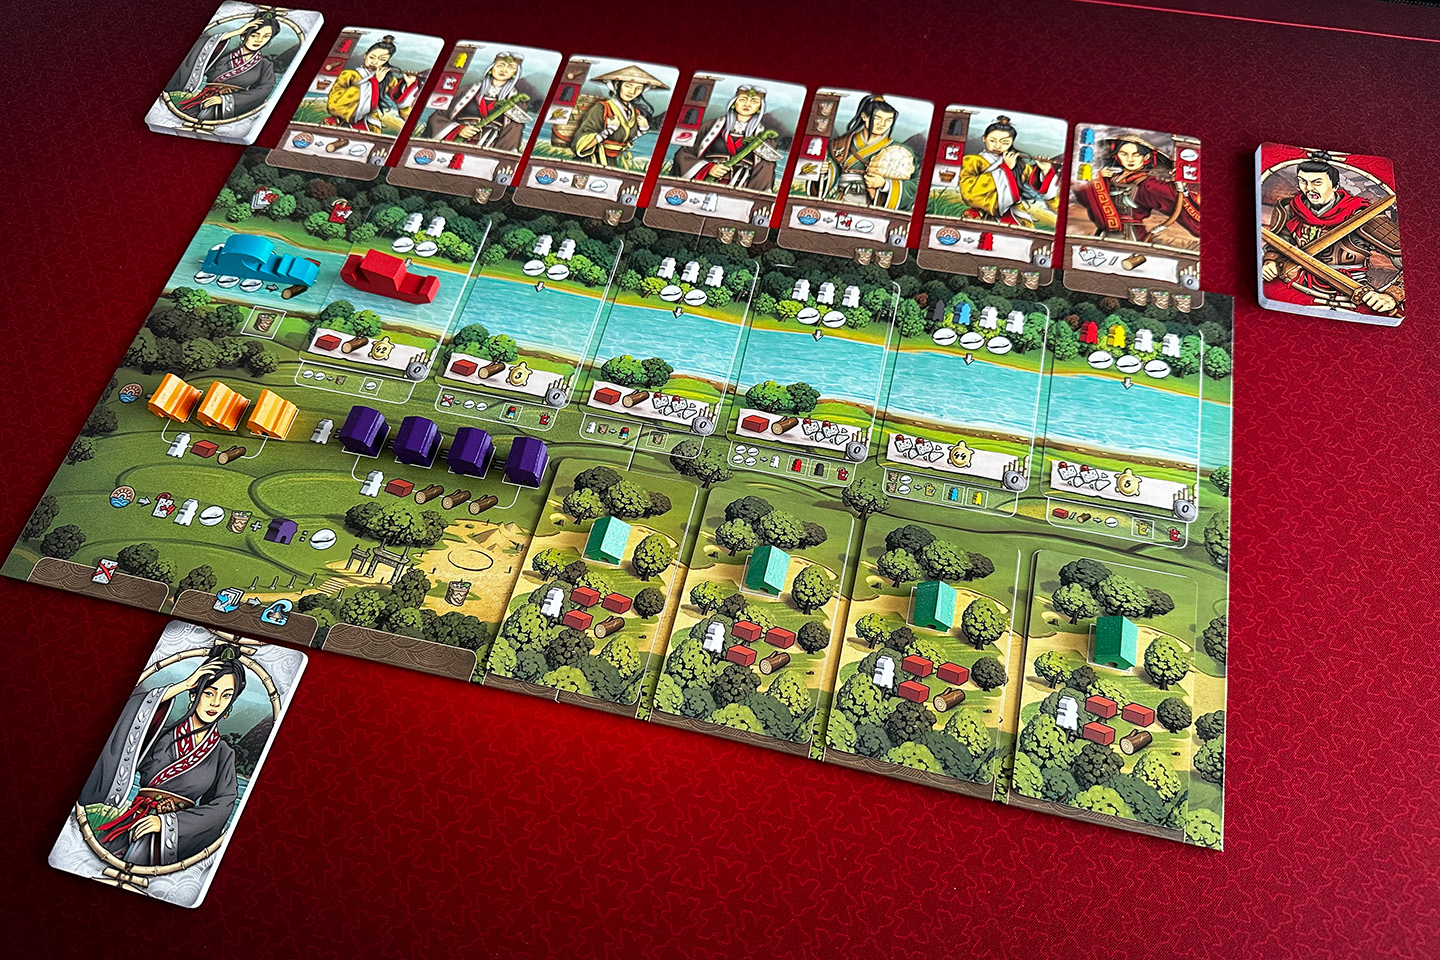
Legacy of Yu is played over a series of rounds. A round starts with a Harvest Phase in which you gain a set number of workers, resources and townsfolk cards from your Ready Pile. Next you can take as many actions as you want and can. Here’s a quick overview of the different actions:
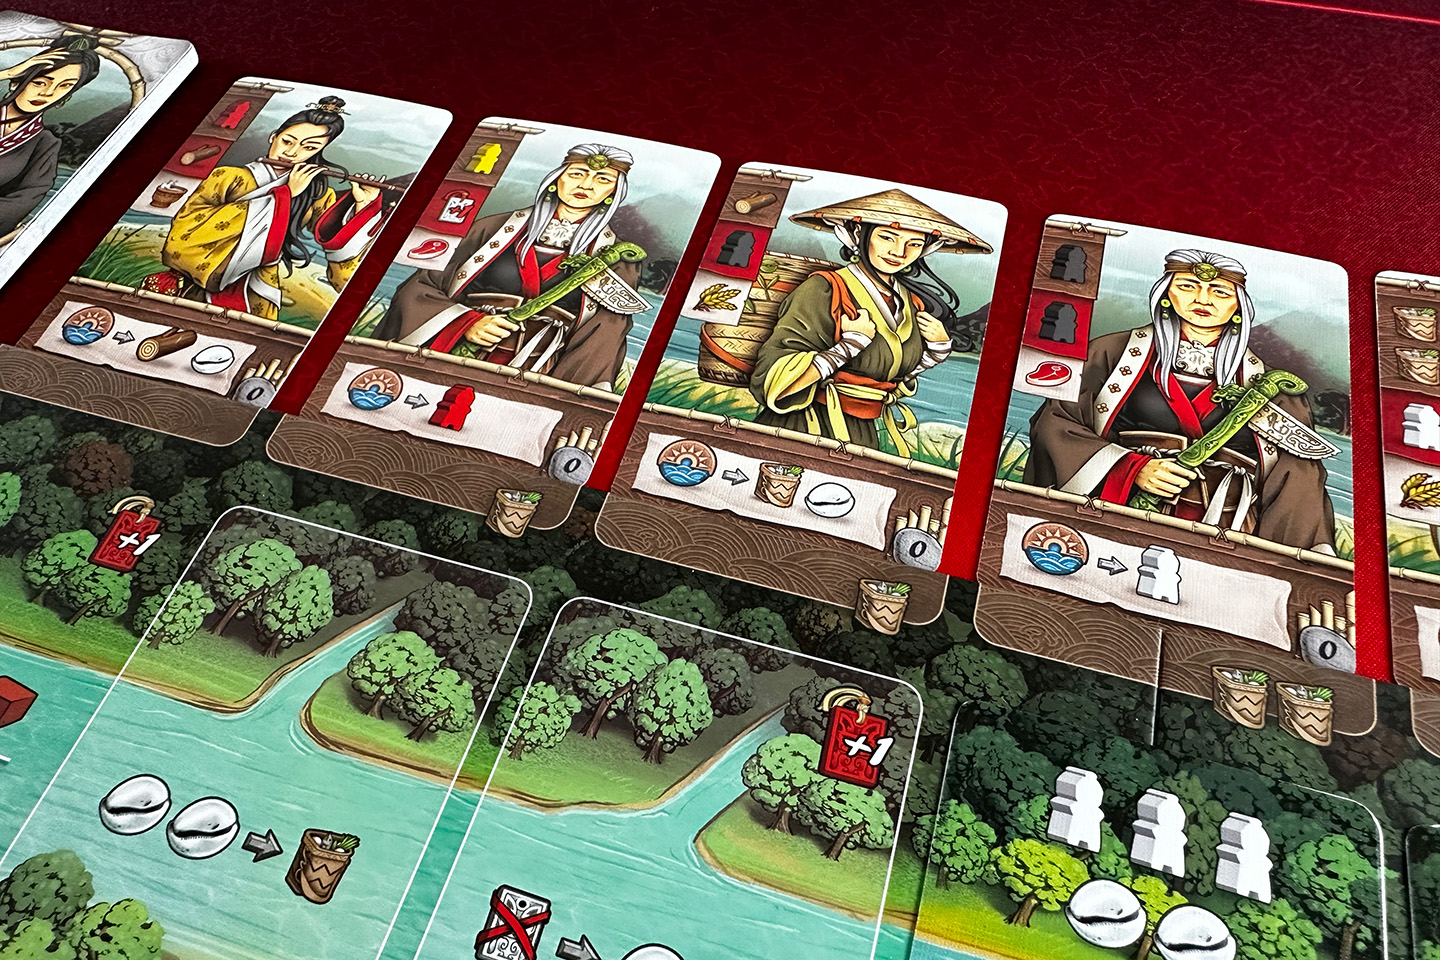
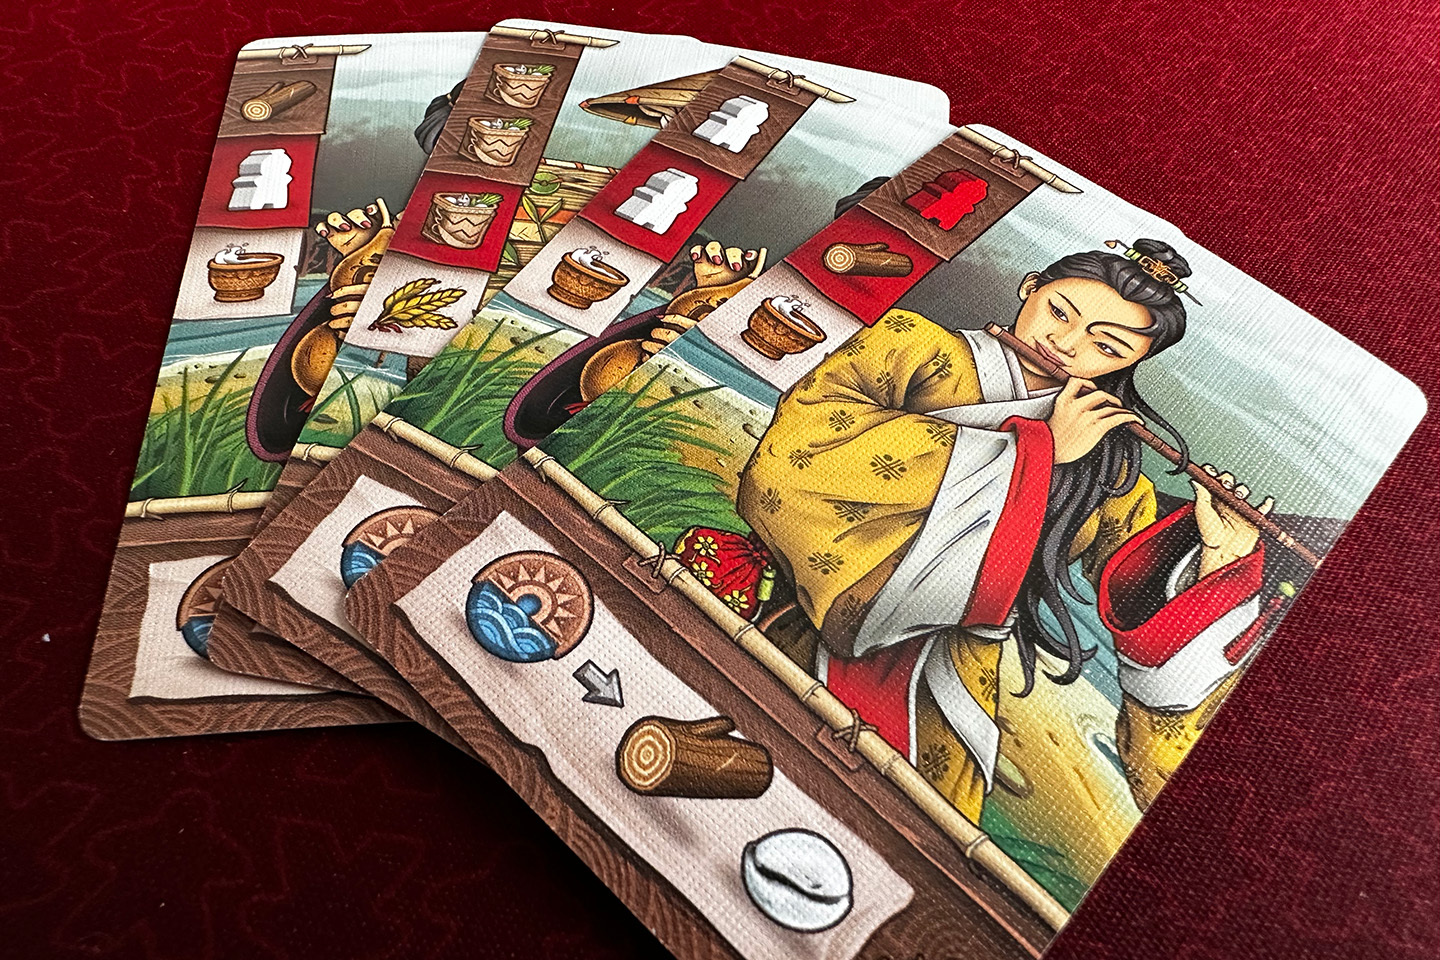
- Play a townsfolk card from your hand to your Exhausted Pile. This gives you the reward (a worker, a resource, an extra card, …) displayed in the brown area in the top-left of the card. When your Ready Pile runs out, the Exhausted Pile is shuffled into a new Ready Pile. So cards you play this way will become available to you again relatively quickly.
- Discard a townsfolk card from your hand to the general Discard Pile. This gives you the rewards displayed in the brown and the red area in the top-left of the card. These cards will be harder to get back into your Ready Pile, so take that into account.
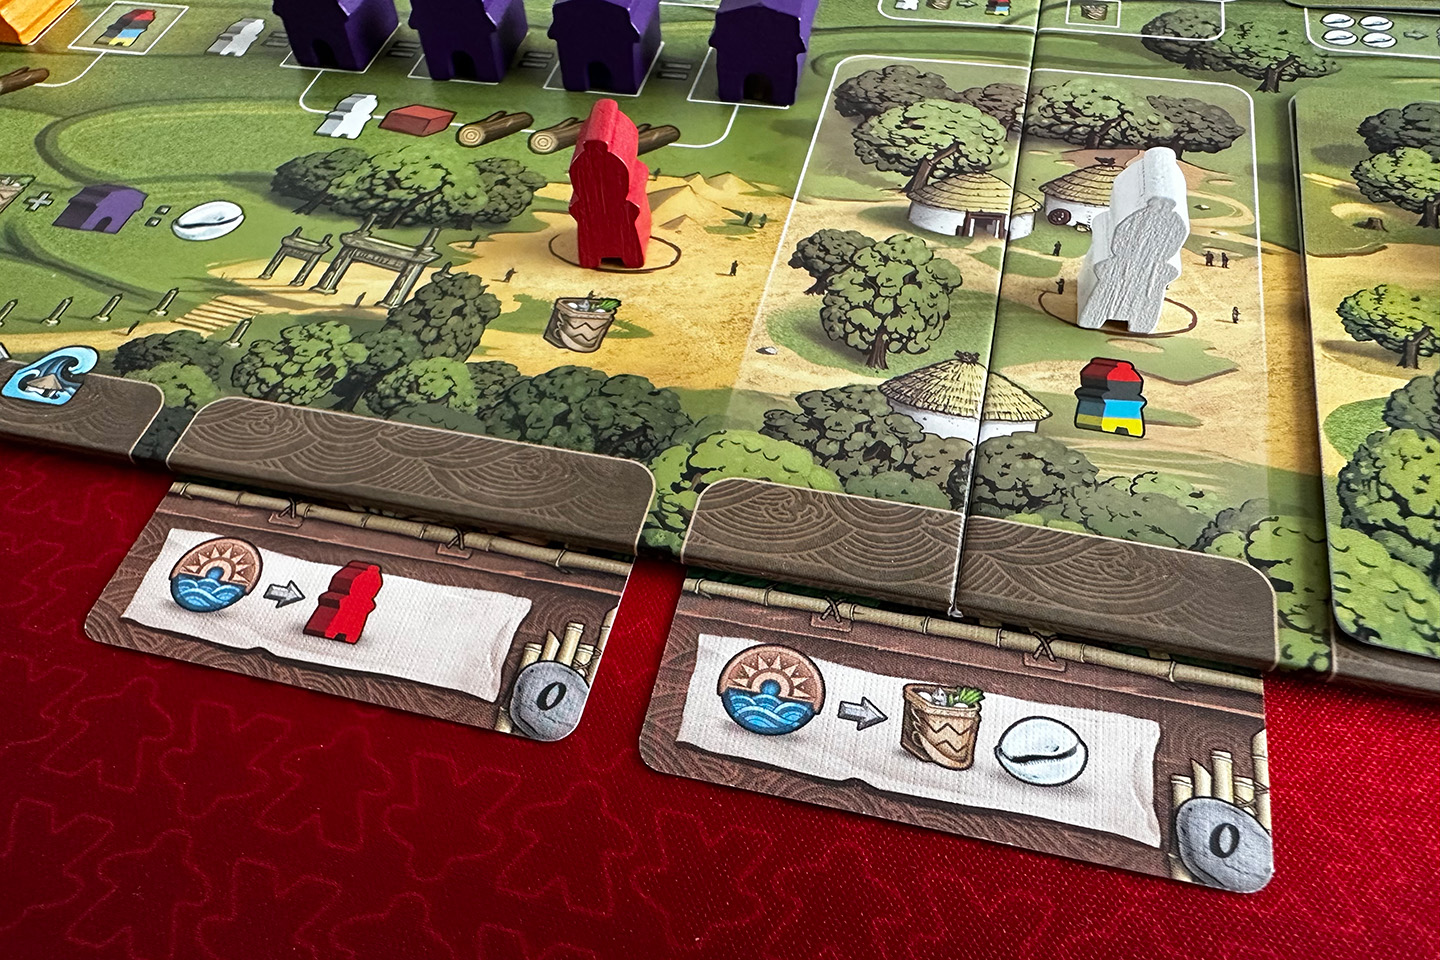
- Tuck a townsfolk card underneath the game board, below an available hut space. You start with one available space and you can unlock up to four more by constructing huts. Cards tucked underneath the board give you extra items displayed on the bottom of the card during harvest.
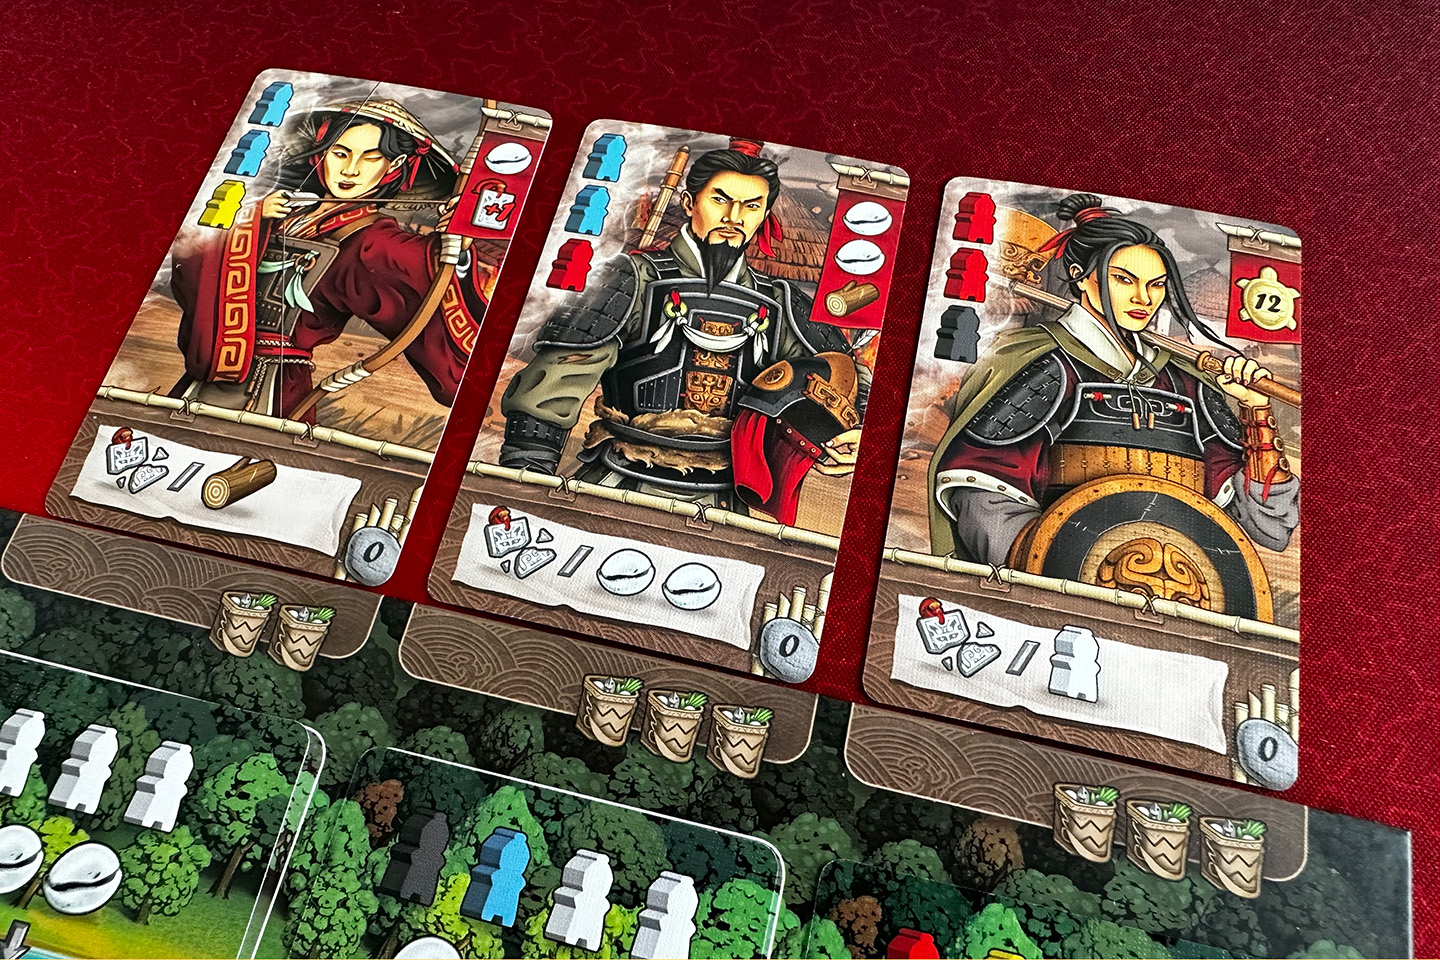
- Recruit or dismiss a townsfolk card from above the game board. Below the cards, on the game board, you will find a number of provisions icons for each card slot. By paying this amount of provisions, you can either recruit the townsfolk card (add it to your Exhausted Pile) or dismiss it (add it to the general Discard Pile and take the reward in the brown area). This is main way to eventually increase your deck, your Ready Pile.
- Attack a barbarian. You start the game with six townsfolk cards and one barbarian card above the board, but it will not remain like that. After a few round you might have only four townsfolk cards and three barbarians. If you ever get to a point where there are seven barbarian cards above the board you will immediately lose, so you need to deal with them by attacking them. Just like when recruiting or dismissing townsfolk cards, you need to pay the cost in provisions printed on the board below the barbarian card you’re attacking. Apart from these provisions, you also need to “pay” workers in the colors displayed on the top-left of the barbarian card. You then get to put the barbarian card in the barbarian Discard Pile and you gain the rewards in the red area on the top-right of the barbarian card.
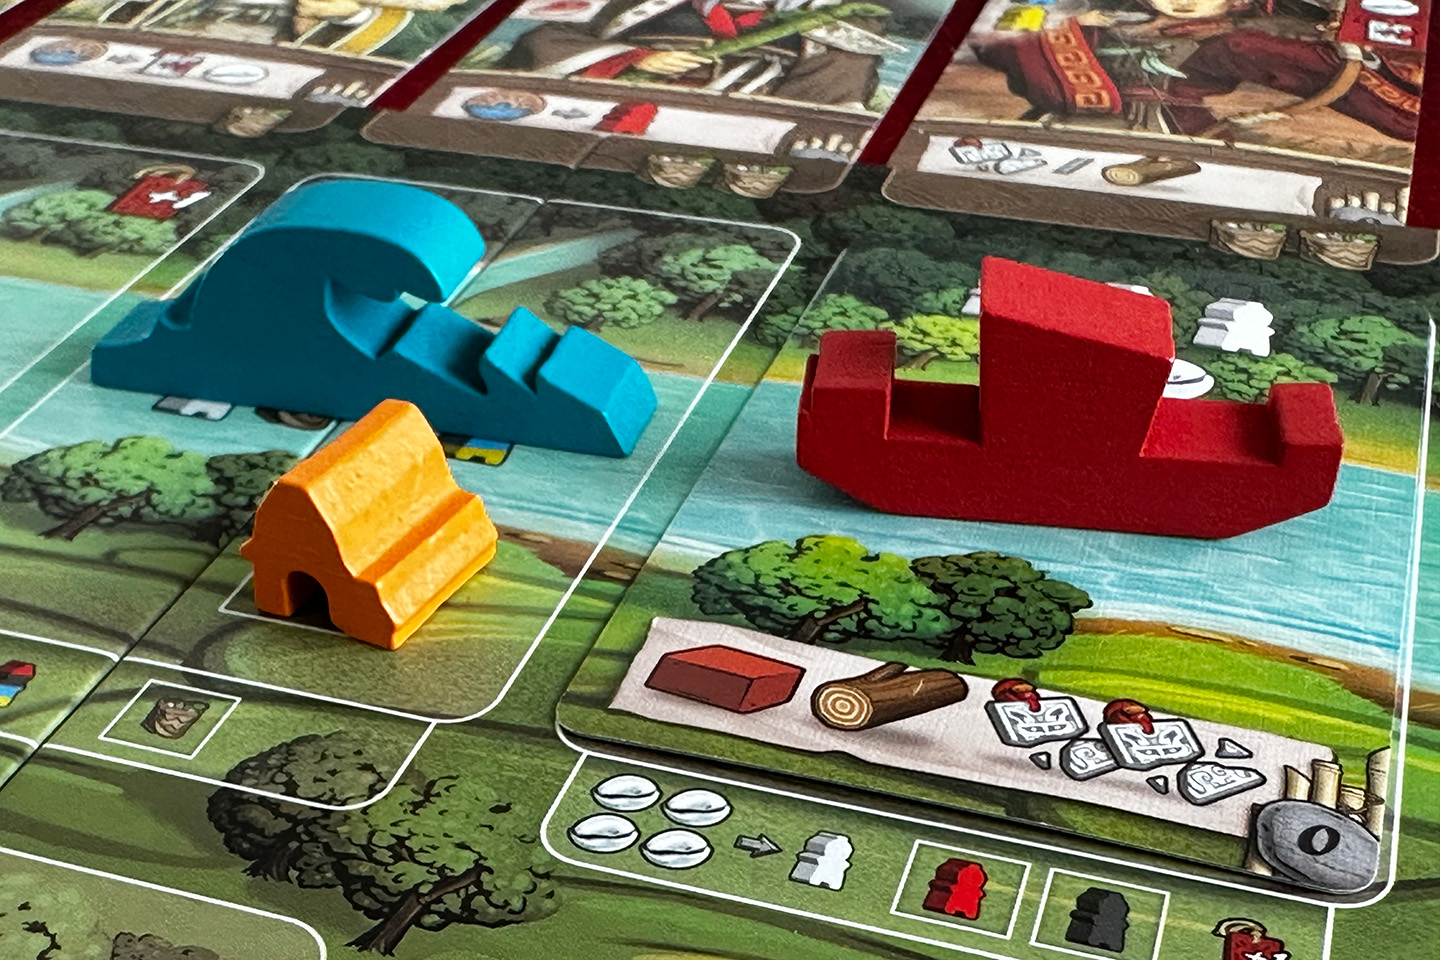
- Build the canal. To build the canal you have to pay the workers and cowrie shells displayed at the top of the left-most canal card, the one that has the barge on it. You then set aside the barge, remove the canal card and do what’s displayed on the bottom of the card. Typically this means you gain some resources (wood and/or clay) and have to destroy the top card(s) from your Ready Pile, moving them to the general Discard Pile, not to your Exhausted Pile. You can only do this action once per round. You get reminded of this by the fact that you can only build the canal when the barge is on the board.
- Construct buildings. When you remove canal cards from the board, you uncover building spots. These are places where you can construct the farms, outpost and huts you put on the board during setup. To construct one of these buildings, simply pay their indicated costs (workers, wood and clay), take a building and place it on an available building spot. Constructing a building gives you two advantages: you uncover a permanent effect when you remove the building from its original location, and you gain an immediate one-off reward for covering up a building site near the canal. The permanent effect depends on the type of building. Farms give you extra workers or provisions during the Harvest Phase. Outposts give you cowrie shells during harvest, but let you treat workers as different color types. Huts make worker placement spots available and give you an extra spot to tuck a card.
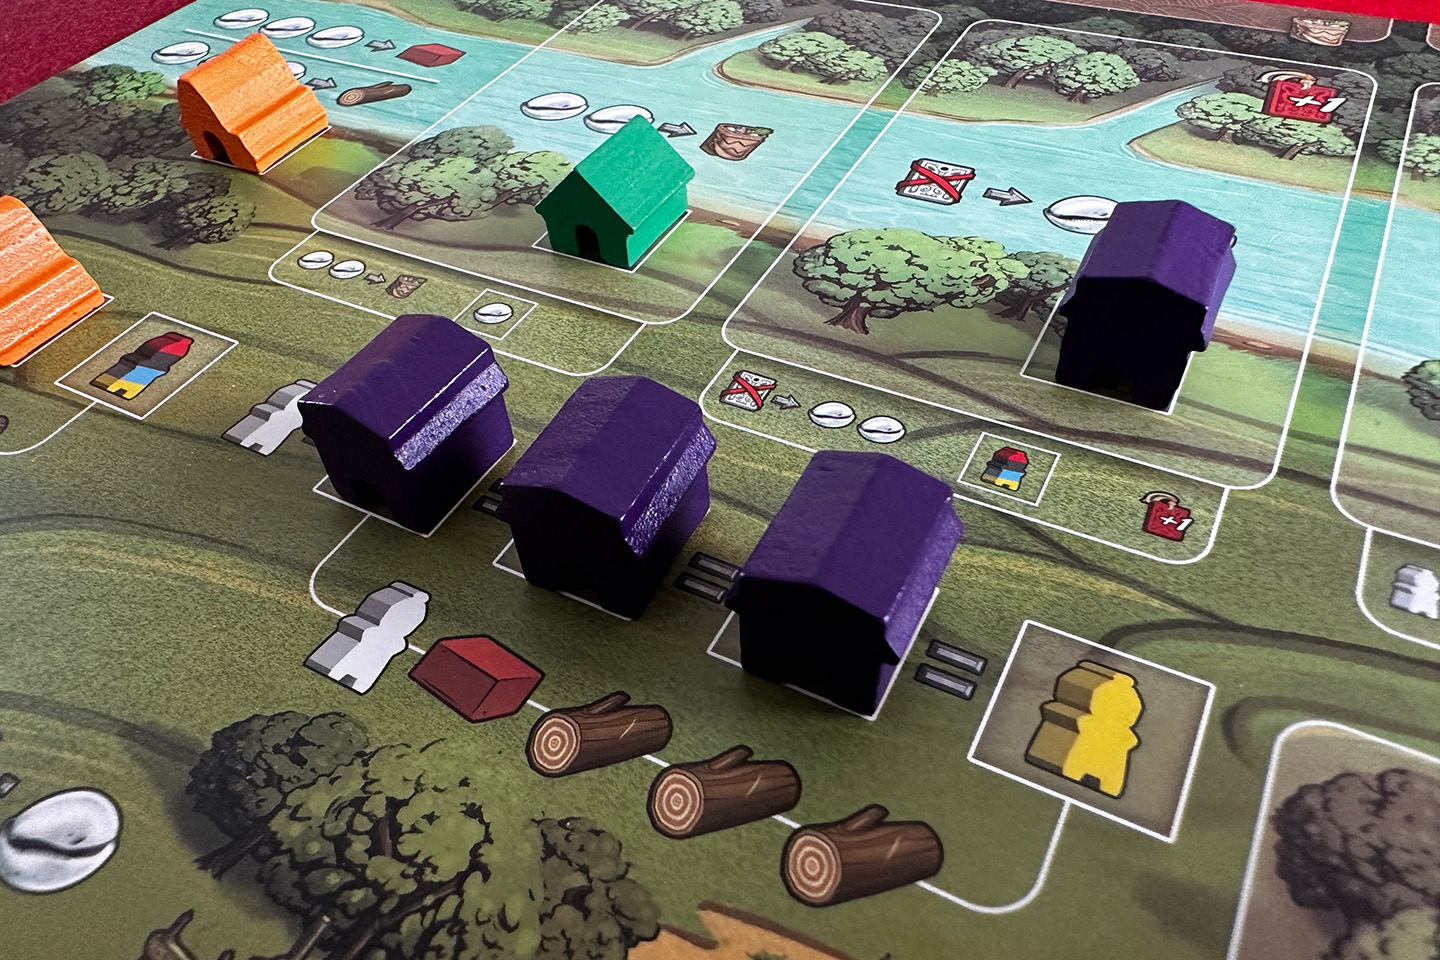
- Use worker placement spots on uncovered huts to gain the immediate reward (a provision, a worker in a specific color, …). The more huts you build, the more worker placement spots you make available. You can place any worker here, no matter the color and the best part is that you get the workers back during the Harvest Phase of the next round.
- Trade. Removing canal cards also uncovers trade options. The left-most part of the canal starts uncovered and this lets you exchange three cowrie shells for one wood or one clay. You can do these trade actions at any time and as often as you can and want.
Like I said, you can take these all of these actions as many times as you can and want and in any order. The only thing that is required, is that you have to use all townsfolk cards in your hand before you end the round.
When you’re done taking actions, three things happen in this order:
- Return the barge to the board. This is of course only necessary if you removed the barge by building a section of the canal.
- Deal with the barbarians you didn’t defeat. For every barbarian that’s still above the board gives you two options. You either suffer their attack or you bribe them. The consequence of their attack and the cost to bribe them is displayed at the bottom of the barbarian cards. Letting them attack you typically means destroying the top townsfolk card from your Ready Pile. The cost to bribe them can be anything from clay, wood, shells or a worker of a specific color. Bribing can be costly, but destroying townsfolk cards can be even more detrimental, so choose wisely.
- Refresh the cards above the board. Slide all remaining townsfolk cards to the left. Then add new barbarians sliding them in from right to left. The number of barbarians you need to add is determined by how many sections of the canal you have built. Finally fill any remaining empty spots between the townsfolk and barbarian cards with new townsfolk cards.
Now that we know the basic round structure, we should talk about how we can win or lose the game.
There are a few ways to lose the game:
- Because of the flood. Whenever you need to draw or destroy a townsfolk from your Ready Pile, for whatever reason, and it is empty, you shuffle your Exhausted Pile to form a new Ready Pile and advance the flood one space to the right on the canal. If the flood ever reaches an unbuilt section of the canal, you immediately lose.
- Because you are overrun with barbarians. If there are ever seven barbarians above the board, you immediately lose the game.
- Because of damage. If you need to destroy a townsfolk card but your Ready and Exhausted Piles are empty, you immediately lose the game.
The only way to win the game is by building all six sections of the canal and surviving the end of the round.
Once you win or lose the game, you draw a card from the six blue victory cards or the six black defeat cards. The back of those cards contain a golden turtle icon with a number in it. The defeat cards contain two such symbols, one for if you lost due to the flood and one for if you lost due to the barbarians. You will also find such icons on various other cards (e.g. barbarians, huts, canals, …) and when you would “gain” it as a reward (via a victory or defeat card, or by defeating the barbarian, constructing the hut, building the canal, …) you get to read the section in the story book corresponding to the number in the golden turtle icon.
These story book sections contain a few paragraphs of flavor text, illustrating the struggles or Yu and his people building the canal and dealing with whatever comes on their path. Besides that, story sections will often also tell you to remove the card that directed you to that part in the story book from the game and search for cards in the big deck of story cards and add those the game. Removing and adding cards is permanent for all your future games in the campaign and can really shake things up by introducing new concepts. The cards you add after winning a game make your future games a bit harder and the cards you add after losing a game make them a bit easier. This way the campaign has a self-balancing difficulty, which I think is pretty clever.
If you have to draw the seventh victory or defeat card, you get to take the golden one. This directs you to one of the concluding story elements in the story book and means you have either lost or won the campaign.
If you have finished the campaign and want to have another go, resetting it is super easy to do. Simply sort all cards by type and look at the number printed in the bottom-right. Cards with a zero are the basic starting cards. Cards with any other number should go back to the story deck, preferably in order to make searching them a bit easier. That’s all there is to it.
What does it look and feel like?
I can’t not start with the insert here. The game comes with a very handy insert that has compartments with sloped edges for the wooden bits on one half, and a variety of card slots on the other half. The insert itself is transparent and the bottom of the box has instructions on where to put what. This is especially useful to give the different types of cards their own place, greatly aiding with setup and clean-up.
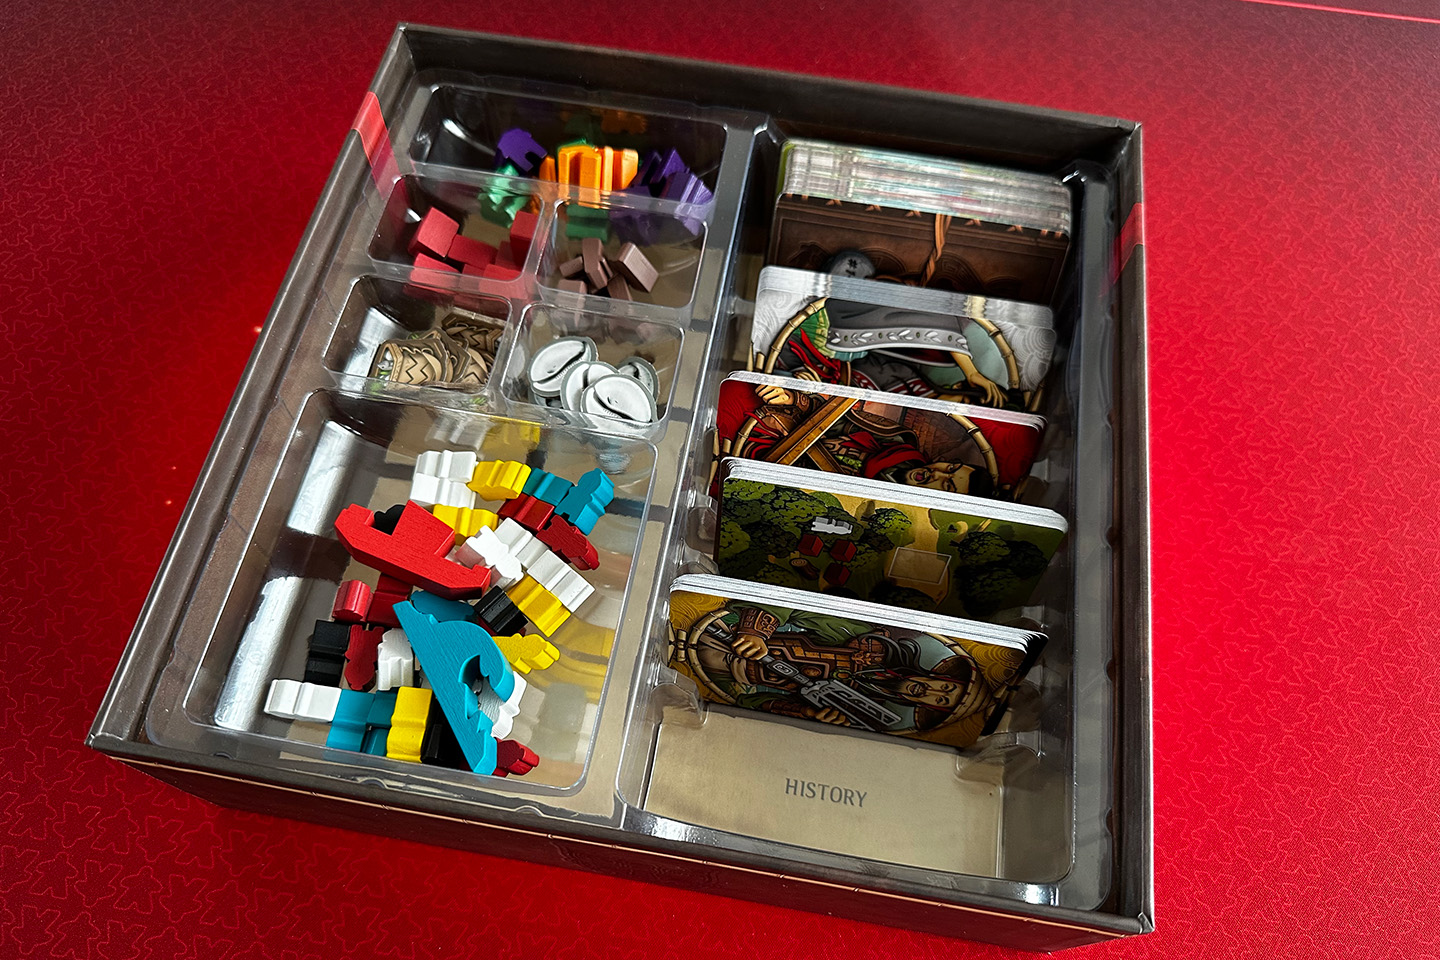
The rest of the components are exactly what you would expect from Garphill Games. Pretty wooden components, nice cardboard, a sturdy game board and high quality cards with a subtle linen finish. No complaints here.
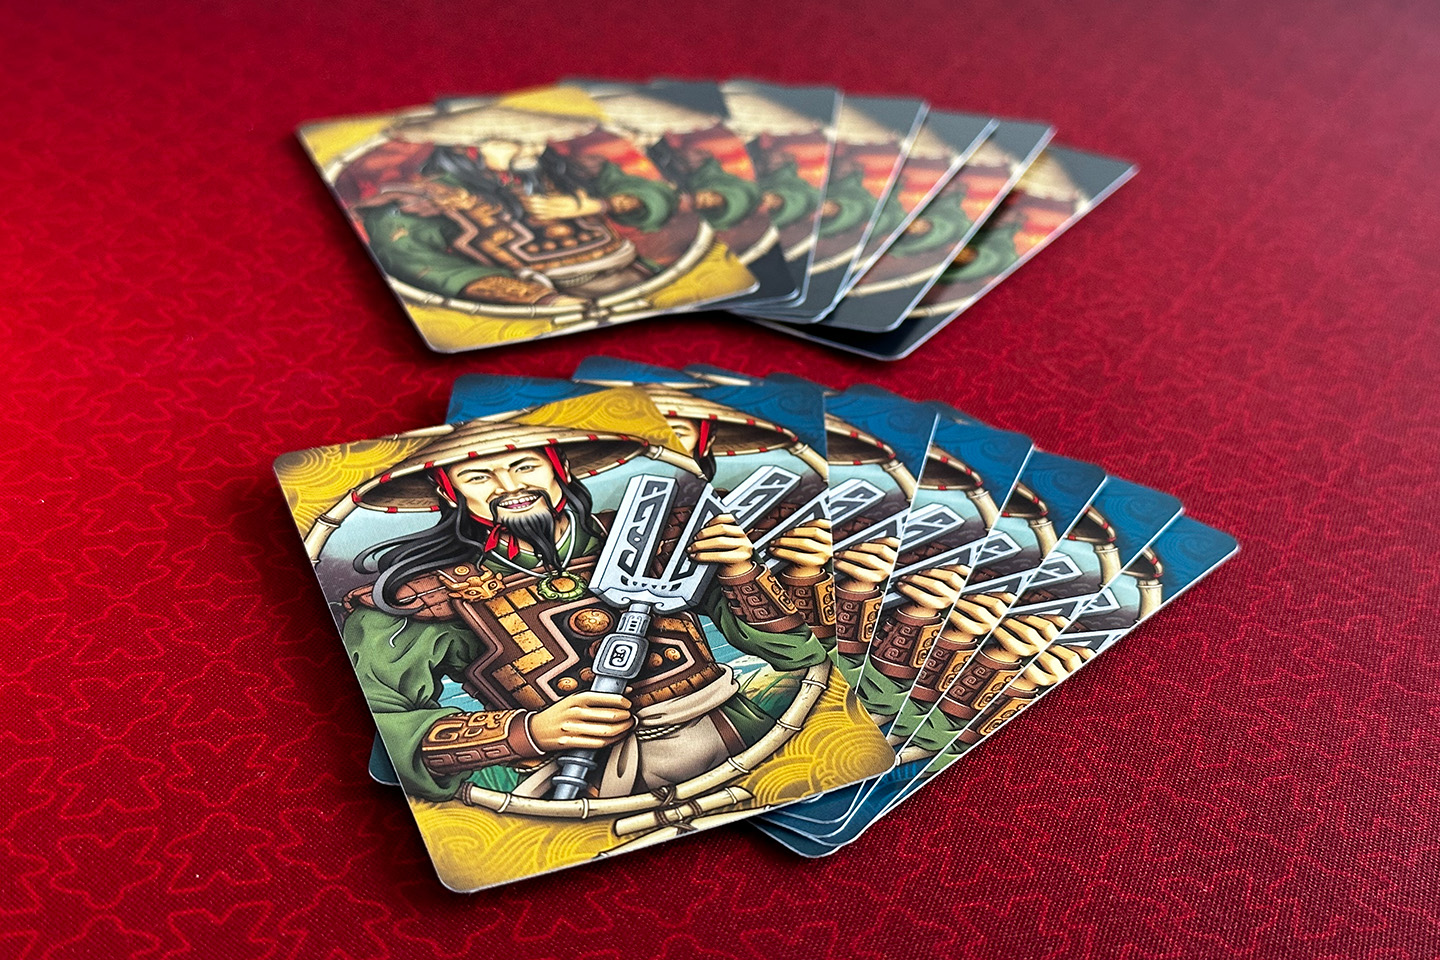
Just like the other games in the Ancient Anthology (and the two games in the Circadians universe, also by Garphill Games), Legacy of Yu is illustrated by Sam Phillips. I have to say I am a big fan of his work. His art style and color palette is straight up my alley and this might be his finest work to date.
Legacy of Yu absolutely is a lovely game to play with and look at.
How much time does it take?
Because of the very functional insert, setting the game up and cleaning it back up is a matter of minutes. I haven’t timed it, but I’m pretty confident it takes less than five minutes before you’re playing.
You’re first game might a take bit longer, but once you’re familiar with the actions you can take and when it’s a good idea to do what, I think you can play a game in a bit less than an hour. You can have moments where you have to make agonizing choices which can make a game take a bit longer, especially if you’re a bit prone to analysis paralysis.
All in all, 50–70 minutes including setup and clean-up seems like a good estimate.
What is my verdict?
I managed to win my first campaign with seven wins against five losses. Those 12 games were spread over a week or three, during which Legacy of Yu was the only game I played. That’s pretty atypical for me because that frequency of plays is well above my average of the past few months and I normally prefer to mix things up instead of playing the same game over and over again. I suppose that tells you something about how much I enjoyed Legacy of Yu.
There are a lot of things to like in this game. I truly am a sucker for multi-use cards and resource conversion. Deciding how to use your hand of townsfolk cards and how to get the exact amount and type of workers and resources you need to accomplish what you need to do is very addictive. The pressure of the approaching flood and the ever increasing number of barbarians gives a fun sense of pressure and excitement. Because the game is really easy to bring to the table and so quick to play I kept coming back to it. The extra cards I unlocked and the self-balancing difficulty also kept things interesting. Up until a point…
You see, after about five plays, I “figured out the game”. At that moment I was losing with four losses against one win. But during my sixth game, which I won, it all clicked and I came up with a strategy to try in my seventh game. Sure enough, it worked. I won the next four games as well, bringing me to six wins and four losses. And I didn’t just barely win them, I left the flood well behind and the barbarians didn’t stand a chance. Because of horrible luck with the cards I lost the next game really badly, after only three rounds. Looking back at it, there was no way I could have won that one, it really were very unlucky circumstances. The next game I kept to my strategy and won again with ease, winning me the campaign.
So while I still enjoyed the mechanisms of the game, once I figured out the optimal strategy, the challenge was completely gone and it was just a matter of executing that strategy as well as I could with the cards I was dealt, almost on autopilot. Apart from that one unlucky loss, it worked like charm every single time.
Even though I really, really enjoyed playing through the campaign, I don’t feel the need or desire to play it again. I have the feeling that one campaign showed me all the game has to offer, even though I probably only saw about 60% of the additional story cards.
This makes this a very hard game to score. On the one hand I absolutely loved it, on the other hand, I don’t feel the need to play it again. But then again, this game might give you 10 to 13 very enjoyable sessions, which is more than I have gotten from some other games, so my final score is mostly influenced by that one very fun playthrough of the campaign. And I’ve read some people are already in their third campaign, so who knows… maybe you’re more like them than like me and you will get more plays out of it than I did.
Score
To make things easier for myself, I use the same scoring categories Board Game Geek uses.
Comments
I'm sorry, I don't support comments on my website. If you want to discuss the game or my review, feel free comment on this dedicated Instagram post or my review on BGG.