Onoda - A Solo Review
01 Nov 2025
This game attempts to explore the effects the 30 years Hiroo Onoda refused to believe World War II had ended must have had on his physical and mental health. How does this tragic and sometimes dark narrative translate to a board game? Let’s find out!
Designer: Francisco Gradaille
Publisher: Salt & Pepper Games
What is Onoda about?
Hiroo Onoda, a Japanese soldier during World War II, remained stationed and hidden on Lubang Island in the Philippines until 1974, because he refused to believe the war had ended. During those 30 years, he and his three companions remained mostly hidden from the locals, only showing up for occasional firefights or for stealing food and supplies.
In this game, you take on the role of Onoda and over the course of 6 rounds, each spanning 5 years, you will have to accomplish missions, gather enough food to survive and repair your equipment. At the same time you are trying to stay healthy, both physically and mentally.
How does it play?
As I have already mentioned, the game is played over the course of 6 rounds. You start the round by revealing a mission card. This card tells you what you need to do and in which region of the island you need to do it. The latter is indicated by putting the big orange mission marker in that region.
Once the mission is revealed, you can take as many actions as you want:
- Move to an adjacent region;
- Raid the region you are in to get food;
- Repair the item associated with the region you are in;
- Accomplish the mission if you are in the correct region.
You decide when you end the round, taking two things into account:
- Accomplishing the mission gives you, next other potential rewards, an honor point and these play a big role in your score calculation at the end of the game.
- At the end of the round you need to have gathered enough food to feed yourself and any companions that are still alive.
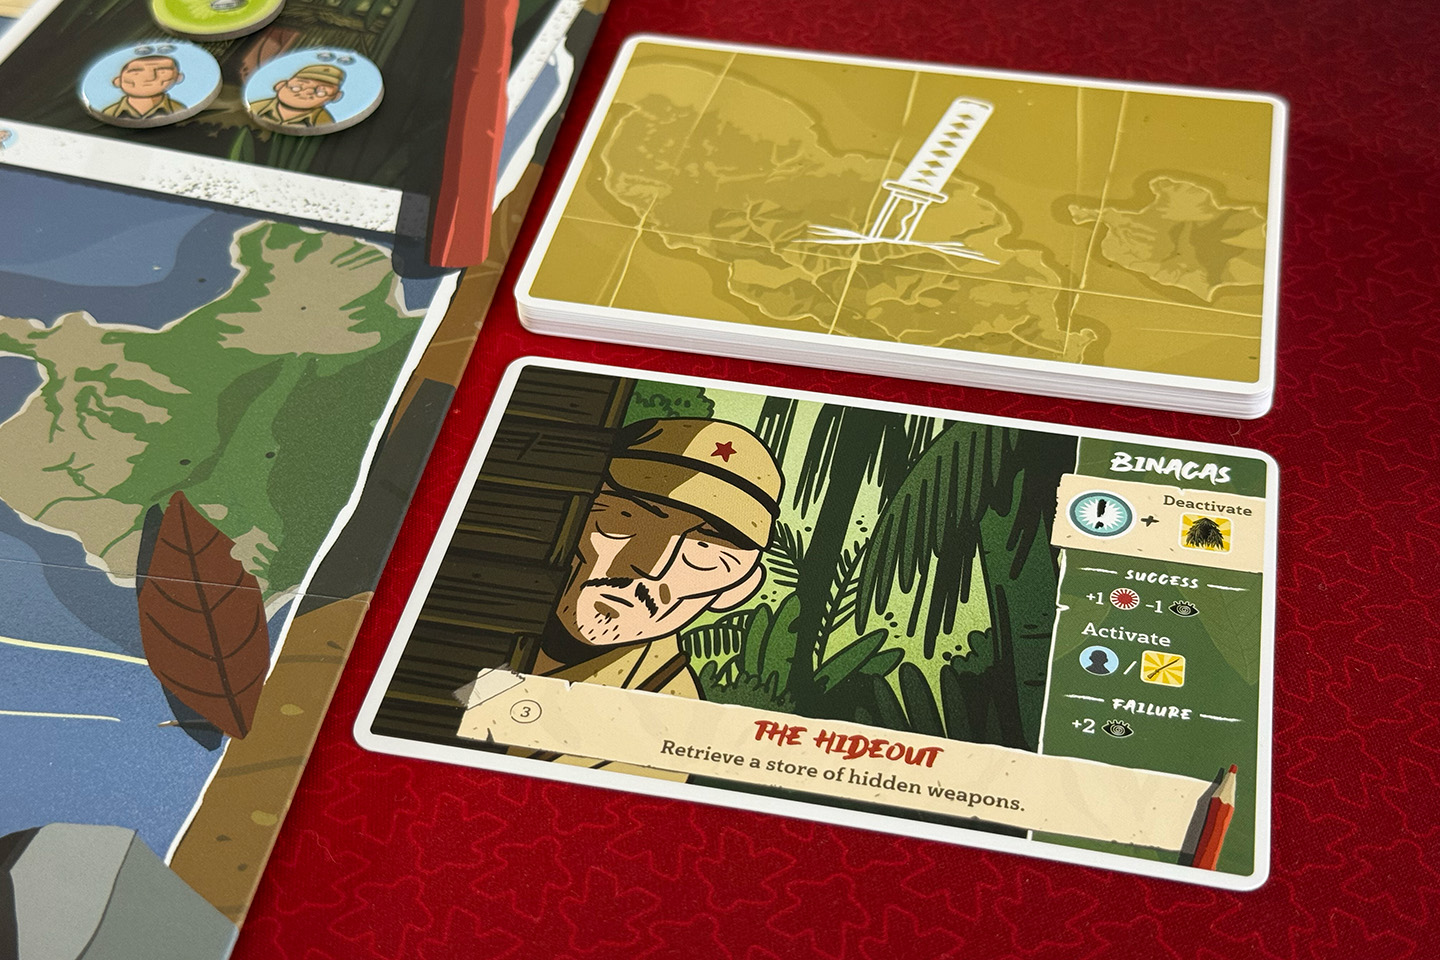
That all seems pretty easy, right? Right! Except, it’s not! Because there are these things called alarm tokens and events. You see, at the end of every action, you need to reveal an event—which sometimes have positive effects but usually are to your disadvantage—and you need to add an alarm token to the region you are in. And these matter because every action except moving requires to pass a check against the number of alarm tokens in your region.
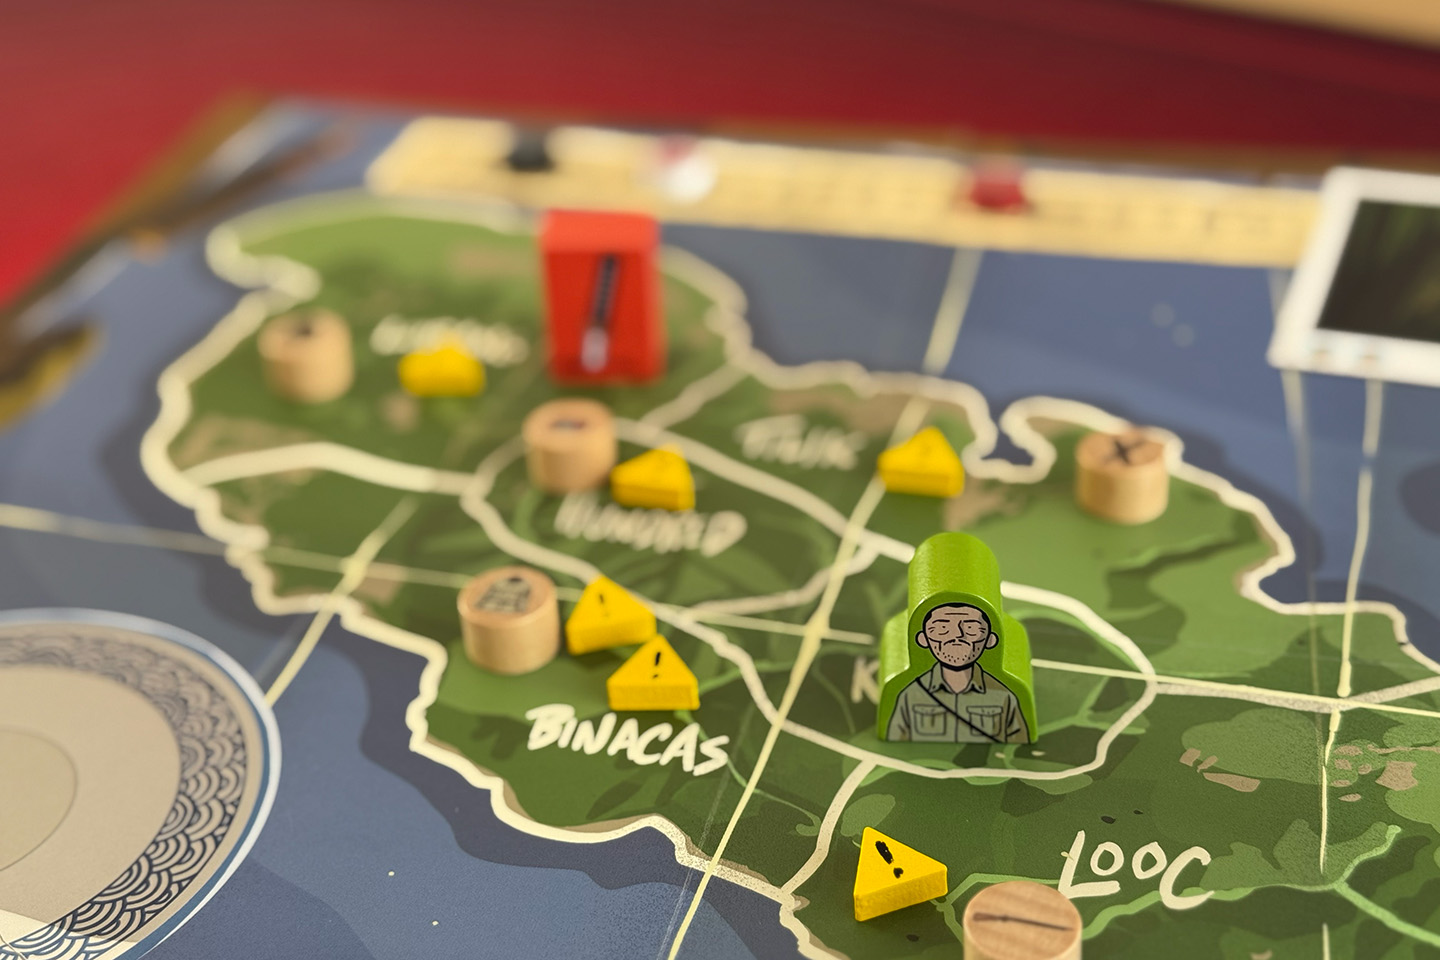
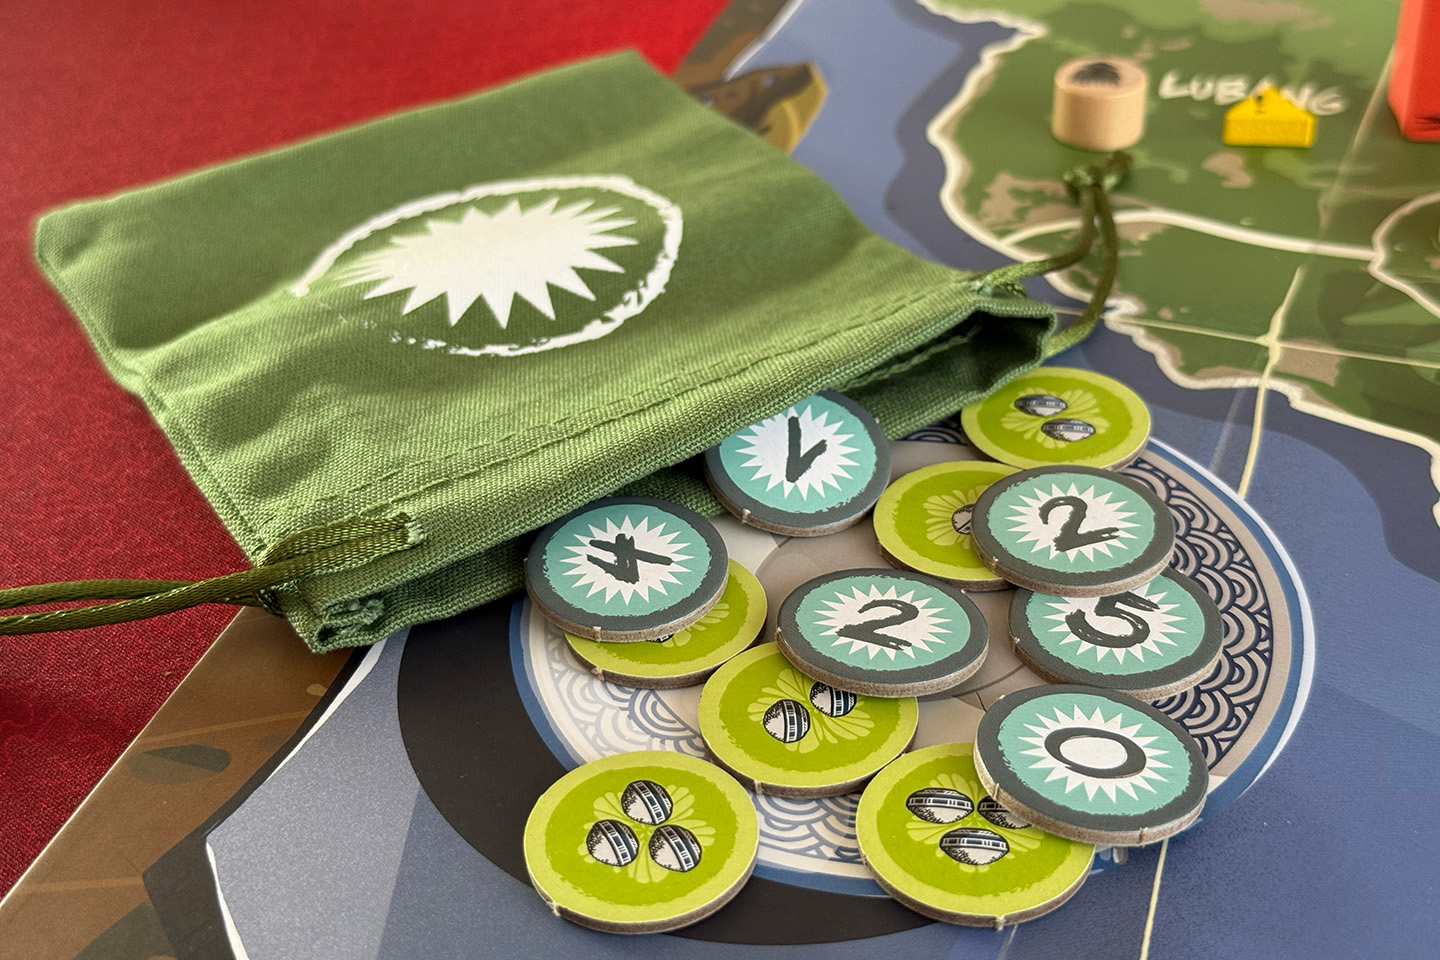
Here’s how these work. Let’s say you move to the region called Binacas, which already has 2 alarm tokens. After you arrive there, you place an alarm token there, so now there are 3 of them. Next you want to a repair action, because your rifle is broken and Binacas is the region that allows you to repair the rifle. To determine if your repair action was successful or not, you need to draw a resolution token from the action bag. There are 12 tokens in total with number from 0 to 6 on them. Each number has two tokens, except the 0 and 6, they only have one token. If the token you drew from the bag has a number that is higher than the number of alarm tokens in your region, your action is successful. If the value is equal to or lower, your action failed. So in our example, with 3 alarm tokens, you would need to draw a 4, 5 or 6 in order to succeed. If you fail, not only does the action just not happen, but you also lose a health in rounds 1 to 3 and a paranoia in rounds 4 to 6.
After you have resolved the check, you need to reveal an event card. These come in three different types:
- Immediate events. You execute what it says and discard it. For example, the event card “Woodcutters” says you need to add an alarm token to the Kyanpu and Five Hundred regions and then you need to do an check against the alarm tokens where you are at that moment. If you succeed you get to remove an alarm token from your location, but if you fail, you need to add one.
- Round events. These have an ongoing effect for the rest of the round, but can be discarded by gaining a paranoia point. For example, the “Giant bees” event says you need to do an alarm token check every time you want to move. If you fail the check, you need to lose either a health point or a food token.
- Reserve events. You can keep these to use whenever you want, but you can only have as many reserve events as you have uninjured companions plus one. For example, the “Salt” event can be discarded whenever you want and allows you to either retry a failed check, or remove a paranoia point and gain a food token, or draw 2 food tokens and keep 1.
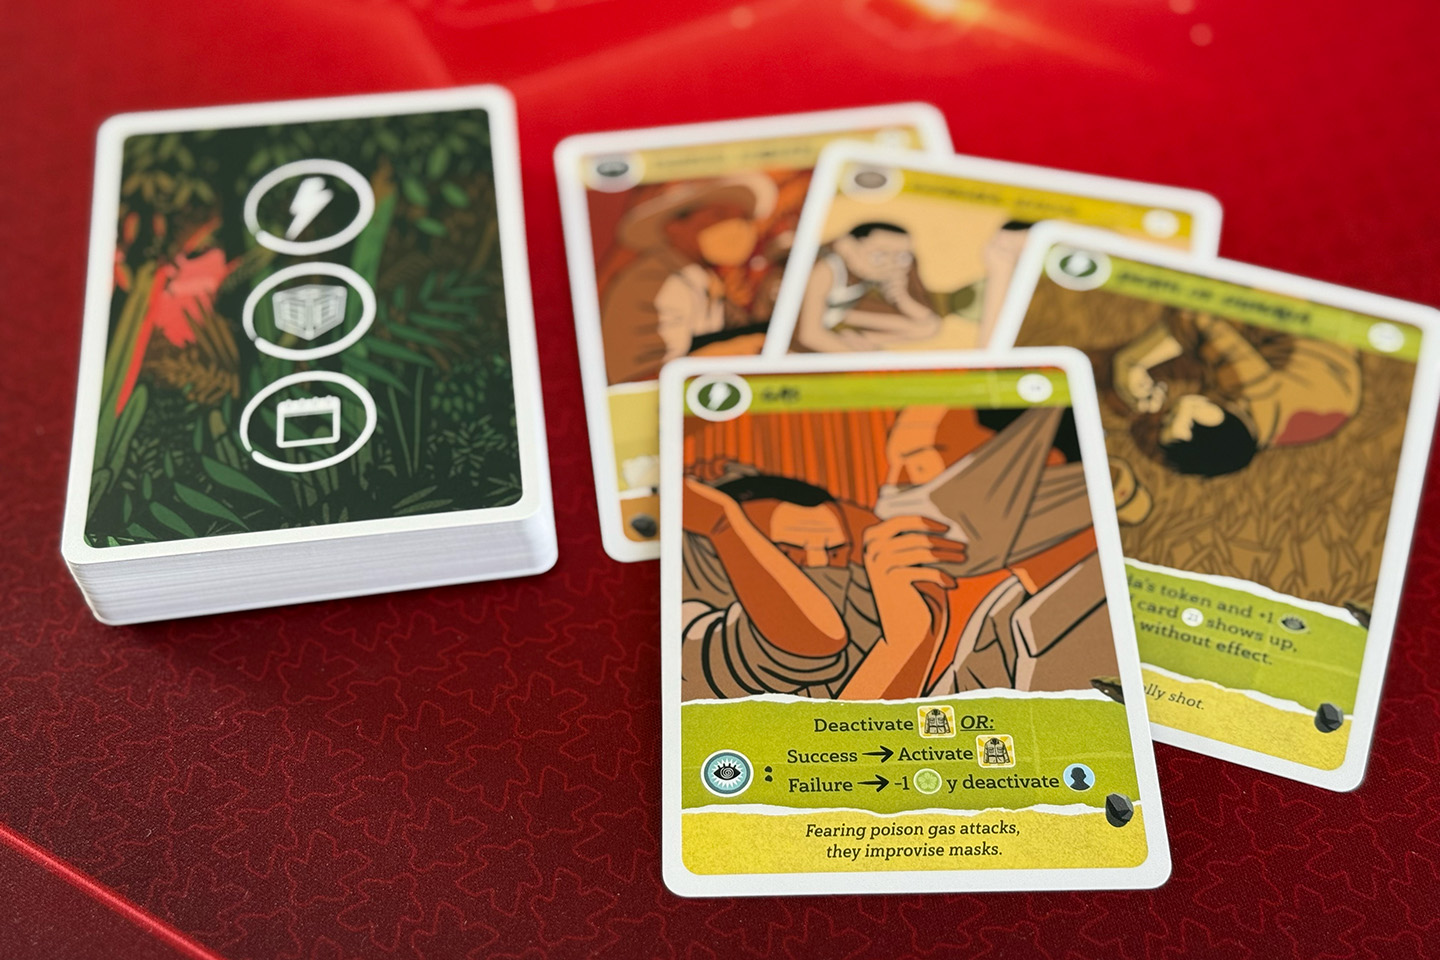
After drawing and executing the event, you need to add an alarm token to the region you are in. So to continue our example, we would add a 4th token to the Binacas region. That means we would need to draw a 5 or 6 token if we want our next action there to be successful!
As you can probably already tell, these alarm tokens, alarm checks and predominantly negative events make everything pretty challenging.
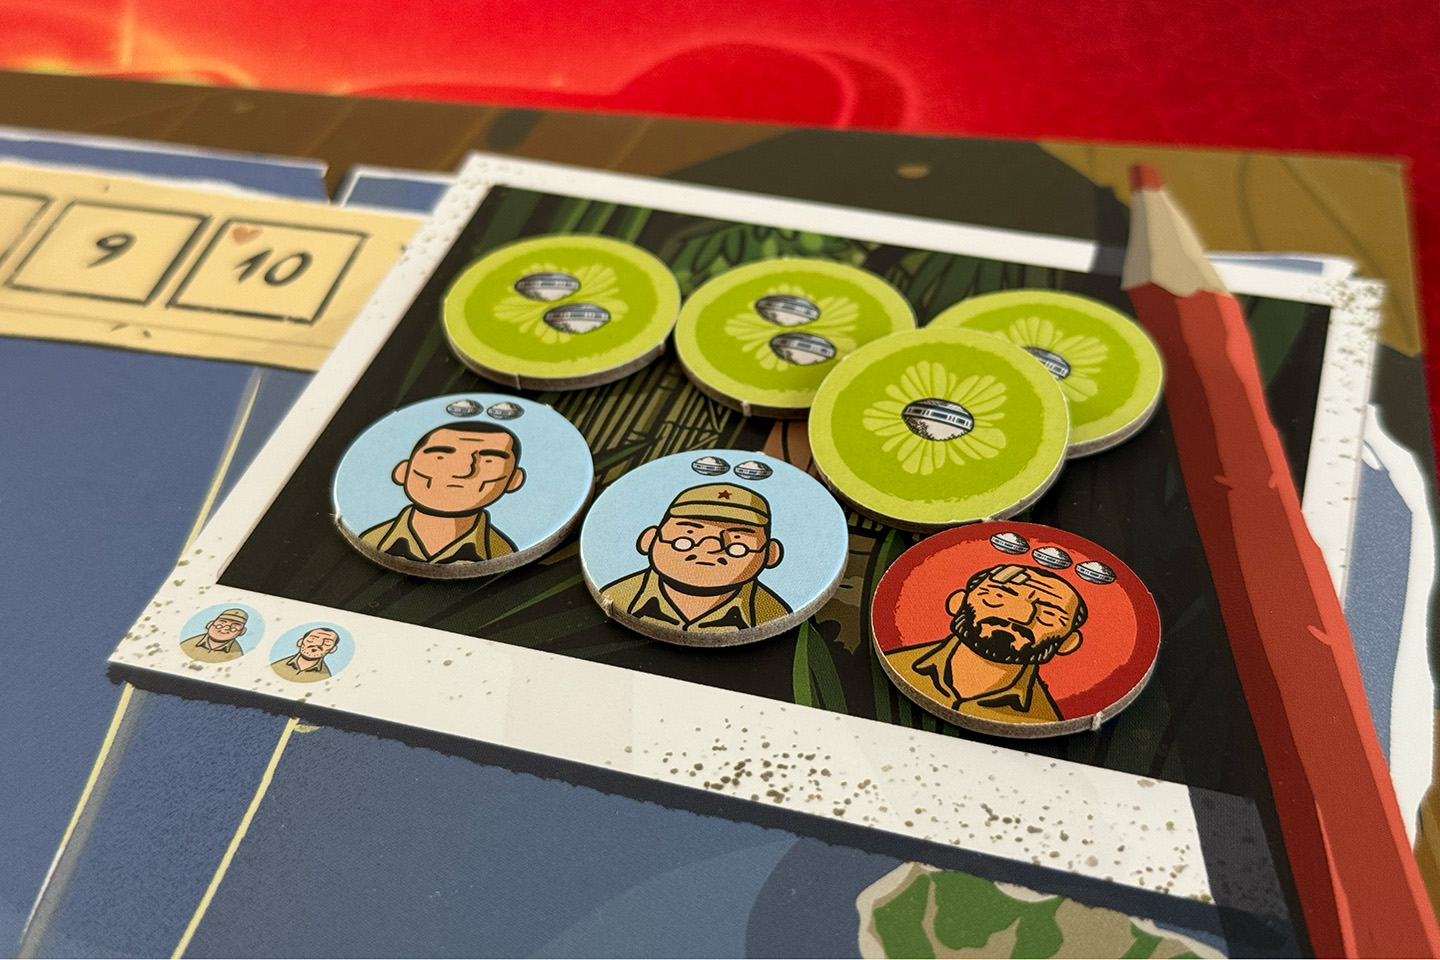
Something else that’s worth mentioning is that those resolution tokens in the action bag are dual sided and serve two purposes. I have already talked about the side with the numbers from 0 to 6. The other side of the tokens contain pictures of rice bowls, from 1 to 3. When you perform a raid action, if you passed the alarm check, you get to draw another token from the bag and put it with the rice icon(s) face up in your camp. At the end of the round you need to have gathered enough food. Onoda himself needs 2 food. So does each companion, except when they’re injured, then they need 3 food.
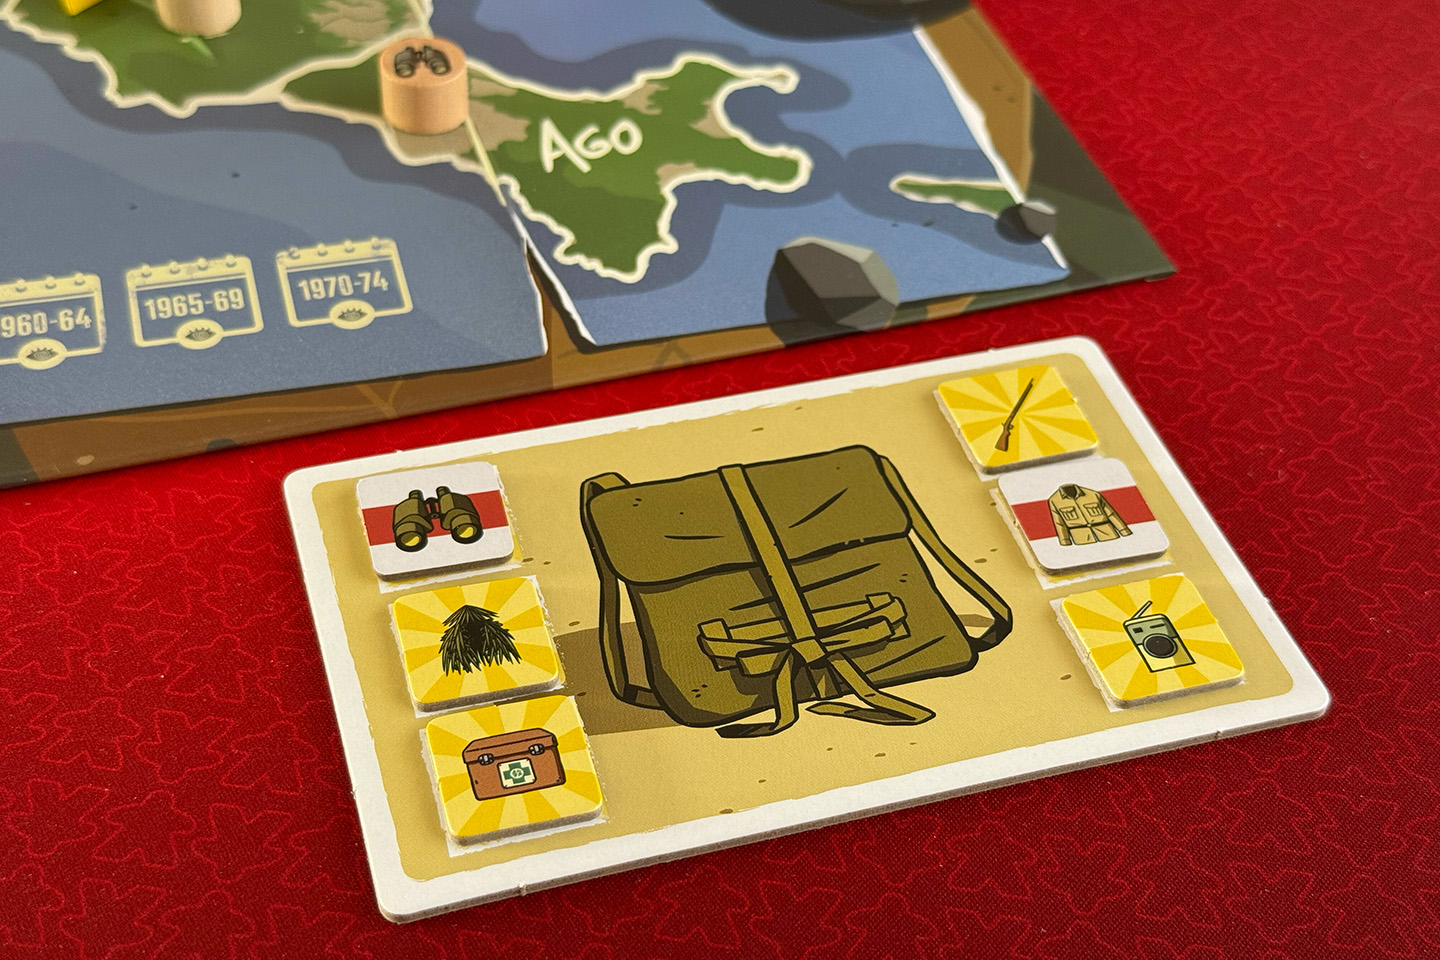
Just like your items (binoculars, rifle, radio, …) these companions are simply things you might need for certain events or missions. For example, a mission might require you to deactivate your rifle or one of your companions (injuring them).
At any point during the round you can move back to the Kyanpu region and decide to end the round. At this point two things happen:
- You get to remove an alarm token from each region.
- You need to feed yourself and your companions. For every extra bowl of rice you have, you may remove an alarm token from a region of your choice. For every resource you lack, you lose one health point.
So, how do you win or lose? You lose when any of these are true:
- Your health drops to 0
- Your paranoia reaches 10
- If your health moves to a value below your paranoia, or if your paranoia moves to a value above your health, you need to do a paranoia check. Similar to the alarm check, but now you compare the token you drew to your paranoia level. If the number on the token isn’t higher, you immediately lose. But, for a paranoia check, you can lose health to make up the difference.
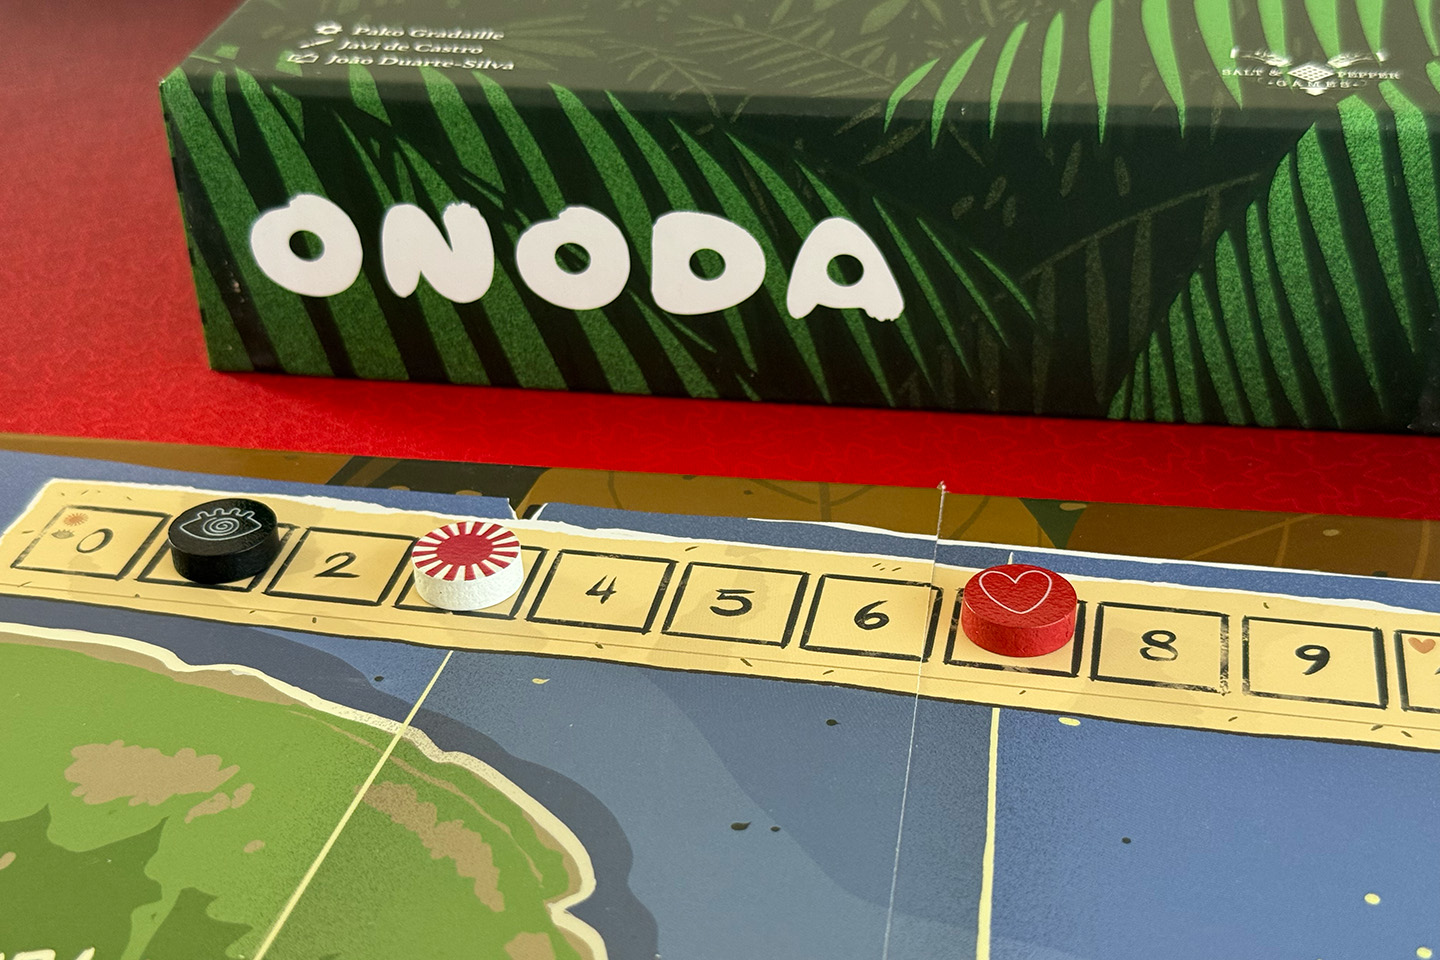
There’s only one way to win: do not lose. If you survive the 6 rounds, you can tally up your points and compare your score to the score chart in the rule book to determine how well you did.
What does it look and feel like?
Nothing to complain about on this front. The cardboard is of a nice thickness and feels very sturdy. The wooden Onoda, the mission marker and the round item markers are very chunky and look great. The game board isn’t too big or too small and it has a nice matte finish, something I’m appreciating more and more now it’s starting to get darker earlier and I have to play games with the direct lighting above my table. Some games have a glossy finish on the cardboard components and that tends to be annoying with direct overhead lights, but that’s no issue with this game.
The art is of course subjective, but I like it a lot. I think artist Javi de Castro did a great job. Not only with his art style, but also with the composition of the drawings. The latter adds more seriousness and emotion to what might otherwise be mistaken as being too playful for the theme.
How much time does it take?
Since setting the game up and packing it back up only takes a few minutes each, a game of Onoda can be played in about 35 minutes, all-in. Maybe a bit longer if you take some more time to think about your actions, maybe a bit shorter depending on how fast you lose.
What is my verdict?
During the crowdfunding campaign I wasn’t sure if I wanted to back Onoda or not. I wasn’t 100% sure the gameplay would be up my alley, but in the end, the theme and the visual appeal of the game pulled me in so I decided to take a gamble. After giving Onoda a few spins it became clear I should have stuck with my gut feeling. I don’t think it is a bad game, definitely not, but it absolutely isn’t a game for me.
One of the reasons it isn’t for me is the random and punishing effect the events and drawing tokens from the bag can have on the game. For example, I remember a game where both my starting companions were killed, so completely removed from the game, in the first three or four turns of the first round. Having no companions means you need less food at the end of a round—at least that’s somewhat positive—but that doesn’t balance out the disadvantages: you can only keep a single reserve event and quite a lot of events and missions require you to deactivate a companion. You obviously can’t do that if you don’t have any.
Another example that really frustrated me was the round event that said that before every move action, I needed to overcome an alarm check. If I failed the check I wasn’t allowed to move. Regardless of whether I succeeded or failed the check, I also needed to add an alarm token to the area I was trying to move from. So when you fail to move, you need to add another alarm token, which will make your next move even more unlikely to succeed. You can of course choose to gain a paranoia point to discard the event, but if you get the event where gaining a paranoia point has equally dramatic effects, there’s very little you can do about it.
Luckily there are also events with positive effects, but after a few games it started to feel as if the events and the tokens I drew from the bag had too big of an impact on the game. It felt as if there was little to no player agency. It usually was pretty clear what to do and you’re just at the mercy of the events and token draws. In the games I won it felt like I just won because I got lucky with positive events and tokens, and in the games I lost it felt like it was because of bad draws from the event deck and the bag. In both cases—wins and losses—it felt like the outcome had nothing to do with my decisions but everything with the events and tokens.
I know for a fact there are people who will really enjoy Onoda. People who can look past the randomness and aren’t bothered by what feels to me like a lack of agency. People who focus on the narrative, the story that unfolds during the game, and don’t care if they win or lose. And if your are someone like that, you will get a game with excellent component quality and great graphics, and I would definitely encourage you to give it a go.
Unfortunately, I am not one of those people.
Score
To make things easier for myself, I use the same scoring categories Board Game Geek uses.
Comments
I'm sorry, I don't support comments on my website. If you want to discuss the game or my review, feel free comment on this dedicated Instagram post or my review on BGG.